• Home
  • Beauty
    • ALL BEAUTY
    • SKIN CARE
    • HAIR CARE
    • BODY CARE
    • NAIL CARE
    • BEAUTY TIPS
  • FASHION
    • ALL FASHION
    • DIY STYLE
    • DIY ACCESSORIES
  • Eco-friendly
    • ALL ECO
    • ZEROWASTE HOME
    • ZEROWASTE BEAUTY
    • UPCYCLE STLYE
  • Decor
    • ALL DECOR
    • DIY DECOR
    • WALL ART
    • UPCYCLE DECOR
    • CRAFTS
    • DIY FESTIVE
  • SEWING
    • ALL SEW
    • SEW STYLE
    • SEW ECO
    • SEW PROJECTS
  • Holiday
    • ALL FESTIVE
    • DIY CHRISTMAS
    • DIY AUTUMN
    • DIY HALLOWEEN
    • VALENTINE'S DAY
    • GIFTS
  • Dine
  • LIFESTYLE
  • Contact
  • Collaborate
  • Subscribe
  • POLICY
Powered by Blogger.

Opal Crown


Summer's here, which means more time outdoors. These homemade bug repellent candles are ideal for those occasions since they work as a natural insect repellent to keep those pesky bugs away. My family enjoys spending evenings on the back patio until the mosquitos arrive and ruin the night. I've never been a fan of using store-bought bug repellent sprays, as they're usually filled with chemicals. That's why I love these homemade candles, as they are healthy for us to breathe and are better for the environment. On top of that, they smell wonderful and look great as decorations.


RECOMMENDED ESSENTIAL OILS:

  • Cinnamon
  • Lavender  
  • Lemongrass
  • Peppermint
  • Rosemary
  • Tea tree
  • Cedarwood
  • Eucalyptus

INGREDIENTS:

  • Soy wax
  • Candlewick
  • Mini terracotta pots
  • 20 drops of citronella essential oil
  • 15 drops of lemongrass essential oil (or other essential oil of choice)
  • 10 drops of peppermint essential oil (or other essential oil of choice)
  • 10 drops of cinnamon essential oil  (or other essential oil of choice)
  • Hot glue gun


DIRECTIONS FOR CANDLE MAKING:

1.) Secure the candle wick to the center base of the pot with a bit of glue.


2.) Set a double boiler by placing a heatproof bowl on top of a pot filled with water. 


3.) Pour the wax into the container.


4.) Stir occasionally until the wax is completely melted. 


6.) Remove the wax from the heat, add the essential oils and mix to combine.


7.) Carefully pour the melted wax into the pot.


8.) Allow the wax to harden.


9.) Trim the excess candle wick.


Share
Tweet
Pin
Share
No comments


There's no secret that I love to DIY, for today's project, I'll be sharing how I upcycled the tiniest and cutest terracotta pots I've ever seen. I found them at Michael's last weekend when I stopped by to get new art supplies. When I saw them, I couldn't resist the urge to buy the clay pots. The first thought that popped to mind was to use them to propagate some of my succulent plants. But first I had to paint the pots, to give them a more modern look. I think they turned out really cute, let me know if you would give this project a try.


MATERIALS NEEDED:


  • Mini Terracotta Pots
  • Acrylic Paint
  • Paintbrushes 
  • Marker

WATCH THE VIDEO OR SKIP DOWN BELOW FOR THE STEP-BY-STEP GUIDE:

DIRECTIONS:

1.)  Start by painting a blob on the pot.


2.) Once the paint dries, sketch a simple design of a plant with a pencil.


3.) Go over the drawing with a black marker.


4.) Allow the paint to dry, and it's all finished. 


Share
Tweet
Pin
Share
No comments


 I love terracotta pots because they're affordable, easily accessible, and are fun to customize. I found these mini planters at my local dollar tree, along with these succulents. I went for a simple design that is easy to recreate.  I love the overlapping layers of paint that give the pots a more modern look. I picked neutral colors to match the decor in my home, but I know it would also look great in vibrant colors.

Disclosure: This post may contain affiliate links, which means that if you decide to make a purchase through my links, I will receive a commission at no additional cost to you. For additional information, please see my disclosure

 MATERIALS:

  • Terracotta pots
  • Acrylic paint
  • Paintbrushes
  • Succulents


WATCH THE VIDEO OR SKIP DOWN BELOW FOR THE PICTURE TUTORIAL:


DIRECTIONS:

1.) Pick three complementary colors to paint your pot. Start by painting the pot with the lightest color ( I decided to use white.)


2.) Once the paint dries, paint half of the pot using a tan/khaki color.


3.) Then, paint the bottom half using a darker shade of brown.


4.) To finish the design, paint a crescent moon using gold paint.


5.) Once the paint dries completely, add in your favorite plants. I used these fake succulents from the dollar store.


Share
Tweet
Pin
Share
No comments


All admit it, I have an obsession with plants. I just love how there are many health benefits of having indoor plants inside your home. Plants purify the air and remove toxins, they make your home smell fresh and can brighten up any room. That's why I have them all over my home because they make me happy, and looking for pots I actually like is fun for me, but sometimes finding the perfect ones can be stressful. Especially when the pots I do like are too expensive. That's why I opted for terracotta pots because they're affordable and easy to transform. All I did was look for some inspiration on Pinterest and started painting. It was that simple!


SUPPLIES USED:
  • Acrylic Paint 
  • Paint Brushes
  • Terracotta Pots
  • Greenery or Flowers


INSTRUCTIONS:


1.) I wanted a natural look, so I freehanded the strips, but you can use painter's tape if the imperfect stripes aren't your cup of tea.


2.) I painted some greenery for the second pot, but feel free to paint something different.


3.) For the third pot, I painted upside-down v's and a couple of dots.


4.) Allow the paint to dry, and retouch some areas if needed.


5.) Once the pots have dried completely, plant your succulents or flowers, and you are all finished!


Share
Tweet
Pin
Share
No comments
Older Posts

About me


Hi there! My name is Stefany. I am the writer and creator of Opal Crown. a crafty blog that covers DIY projects, beauty, fashion, decor, lifestyle, sustainability, and much more.

Subscribe For Weekly Updates

* indicates required

Popular Posts

  • DIY Candle Bug Repellent With Essential Oils (Non-Toxic)
  • DIY Beaded Phone Charm
  • DIY Flaxseed Mask For Hair Growth
  • Fringed Tassel Earrings
  • Thrifted Scalloped Glass Bowl Makeover
  • How to make rice water for hair growth
  • DIY HAIR & SCALP DETOX MASK (+ How to use it)
  • DIY Rose Petal Body Scrub

Featured Post

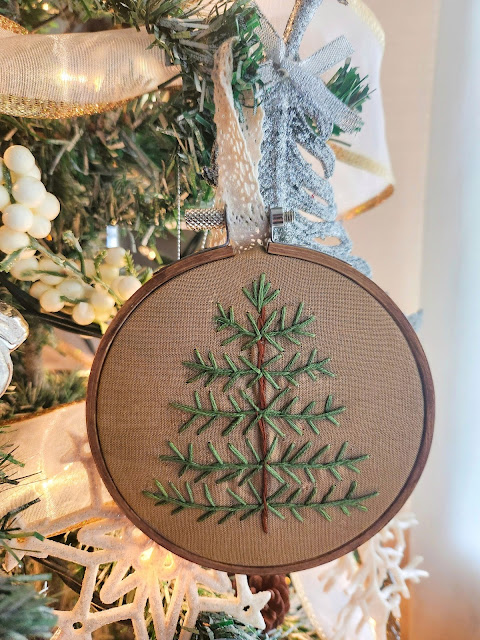
DIY Embroidered Christmas Ornaments

Are you looking for a unique gift idea or new, adorable ornaments to hang on your tree this year?   I have the answer—embroidered ornaments!...

Click To Download

Click To Download
Stay focused and organized throughout the day with a daily planner to help you stay on track with your daily tasks. There are 3 different styles to choose from.

Follow Us

  • instagram
  • pinterest
  • youtube
  • tik tok

Created with by ThemeXpose | Distributed by Blogger Templates