• Home
  • Beauty
    • ALL BEAUTY
    • SKIN CARE
    • HAIR CARE
    • BODY CARE
    • NAIL CARE
    • BEAUTY TIPS
  • FASHION
    • ALL FASHION
    • DIY STYLE
    • DIY ACCESSORIES
  • Eco-friendly
    • ALL ECO
    • ZEROWASTE HOME
    • ZEROWASTE BEAUTY
    • UPCYCLE STLYE
  • Decor
    • ALL DECOR
    • DIY DECOR
    • WALL ART
    • UPCYCLE DECOR
    • CRAFTS
    • DIY FESTIVE
  • SEWING
    • ALL SEW
    • SEW STYLE
    • SEW ECO
    • SEW PROJECTS
  • Holiday
    • ALL FESTIVE
    • DIY CHRISTMAS
    • DIY AUTUMN
    • DIY HALLOWEEN
    • VALENTINE'S DAY
    • GIFTS
  • Dine
  • LIFESTYLE
  • Contact
  • Collaborate
  • Subscribe
  • POLICY
Powered by Blogger.

Opal Crown

Making this turmeric jelly mask is easy. It will give your skin a revitalized appearance! Did you know that turmeric is loaded with benefits that can help treat various skin conditions? When combined with aloe vera gel, it can benefit the skin by nourishing, soothing irritation, preventing acne/pimples, and fighting signs of aging. Honey and jojoba oil are also added to this recipe to brighten and hydrate to give the skin a radiant glow.


INGREDIENT BENEFITS:

TURMERIC: 

  • lightens hyperpigmentation
  • brightens skin tone
  • contains anti-bacterial & anti-inflammatory properties 
  • helps heal acne
  • clears skin
  • natural exfoliator
  • reduces dark spots
  • boosts circulation
  • anti-aging (boost collagen production)
  • moisturizes dry skin
  • helps with psoriasis & eczema 

ALOE VERA:

  • reduces fine lines & wrinkles
  • adds a natural glow
  • depuffs skin
  • soothes
  • nourishes
  • hydrates dry skin
  • neutralizes free radical damage
  • fights breakouts
  • heals wounds
  • full of antioxidants
  • anti-inflammatory & anti-bacterial properties

HONEY:

  • fights acne & blemishes
  • brightens skin complexion
  • lightens scars
  • natural exfoliator
  • minimizes wrinkles
  • adds a dewy glow
  • moisturizes dry skin
  • helps with psoriasis 
  • packed in antioxidants
  • anti-inflammatory & anti-bacterial properties

JOJOBA OIL:

  • promotes skin regeneration
  • anti-aging
  • contains vitamin B complex (fades pigmentation)
  • contains vitamin E 
  • loaded with antioxidants
  • helps fight free radical damage
  • repairs skin
  • non-greasy moisturizer
  • non-comedogenic
  • anti-bacterial & anti-inflammatory properties
  • heals wounds
  • helps with acne
  • helps with psoriasis & eczema 


 INGREDIENTS:

  • 3 tbsp Aloe vera gel 
  • 1 tbsp Jojoba oil 
  • 1 tsp Turmeric powder
  • 1/4 tsp Honey 


DIRECTIONS:
  1.  Add the aloe vera, honey, and jojoba oil to a clean bowl. Mix to combine.
  2. Add the turmeric powder and mix until well incorporated.

HOW TO USE:

  1. Before applying the mask, cleanse your skin.
  2.  With a mask brush, apply the face mask to your entire face and leave it on for 10 minutes.
  3. Rinse and follow up with a moisturizer.


Turmeric may stain your skin and clothing, so make sure to use it with extra care when mixing up your recipe. It is recommended to use wild turmeric, which is non-staining and is used in skincare products.


 CLICK HERE TO DOWNLOAD 


Share
Tweet
Pin
Share
1 comments

Do you know what a lash and brow serum are? They help to strengthen and enhance your lashes and brows, making them look fuller and shinier. It's simple to make and only requires three ingredients!

Do you want your lashes/brows to be fuller, thicker, and longer? Then you should try this homemade conditioning serum! Lately, my lashes and brows have become dry and brittle due to frequent lash and brow tinting. I must admit I didn't follow the aftercare instructions, and as a result, they have been falling off. I've been looking for an affordable growth serum for weeks, but they're all ridiculously expensive. Until I finally gave in and decided to make my own. After all, how hard could it be? With just a few basic ingredients, I was able to create my very own hydrating growth serum. An extra bonus, it doubles as a clear mascara gel.


HOW TO PRESERVE A HOMEMADE  SERUM:

Since aloe vera is a water-based ingredient, we must add a preservative to this brow and lash serum to increase its shelf life. However, if you want your serum to be free of preservatives. I have 2 options for you.

  • 1: To prevent the serum from spoiling and introducing bacteria and mold, you must use it up within 5 days (if you decide not to add a preservative.)
  • 2: Use castor oil and vitamin E only and skip the aloe vera gel. Anhydrous products don't need a preservative. Add an antioxidant to your anhydrous recipes to prevent rancidity and extend the shelf life of your oils.


BENEFITS.

ALOE VERA:  For centuries, aloe vera has been used as a natural remedy for several skin conditions. Additionally, it has grown in popularity as a remedy for hair loss. Aloe vera contains various active ingredients and minerals that can help strengthen and condition hair to reduce breakage. It contains fatty acids and amino acids, as well as vitamins. These contribute to healthy hair follicles. 

CASTOR OIL: Aside from its antifungal and antibacterial properties, castor oil is rich in nutrients such as proteins, minerals, and fatty acids that nourish the skin and hair. It also has natural compounds that stimulate hair growth.

VITAMIN E: Aside from its anti-aging and skin-conditioning properties, vitamin E promotes longer lashes and eyebrows. Vitamin E oil aids in the reduction of oxidative damage, which contributes to hair loss. Due to its antioxidant and conditioning properties, vitamin E can help with hair growth. 


 INGREDIENTS NEEDED:

  • 2 TBSP Aloe vera gel
  • 2 TBSP Castor oil
  • 1/4 TBSP Vitamin E
  • Empty mascara tub


DIRECTIONS:
In a clean jar or an empty mascara tube, combine all of the ingredients. 


HOW TO USE:
Apply with Q-tips or a mascara wand at night. Use it daily and you'll see results within a few weeks.

(Rinse eyes if the product goes inside the eyes.)

 CLICK HERE TO DOWNLOAD 


Share
Tweet
Pin
Share
No comments


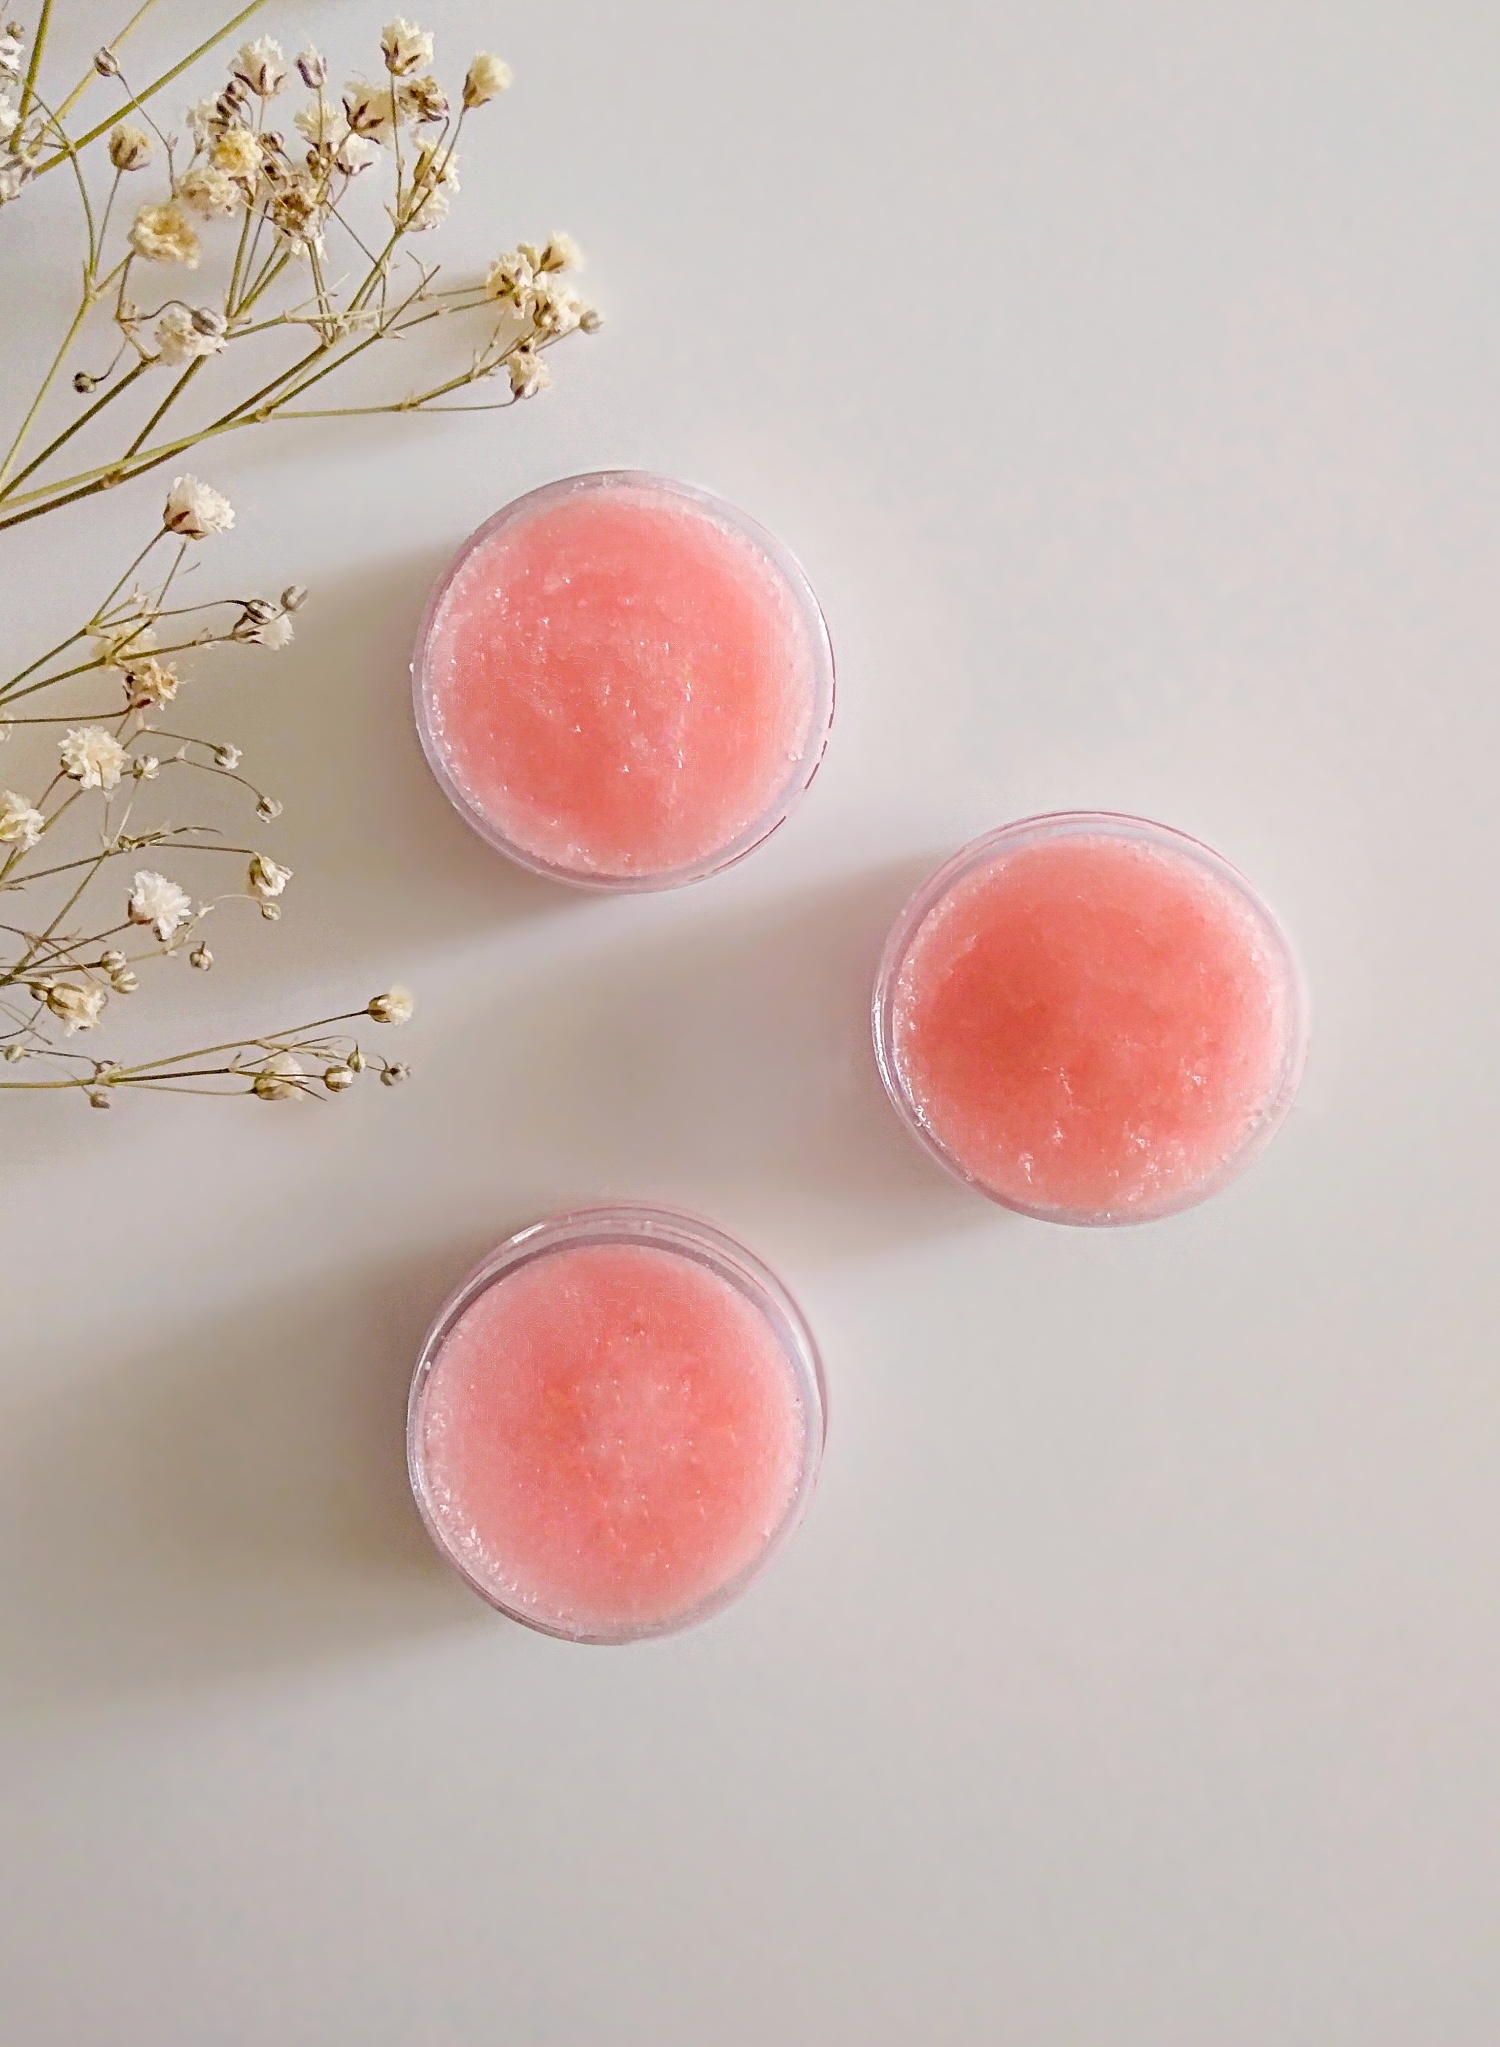
Your lips will love these gentle lip scrubs.  For today's project, I devised two easy recipes. The first is a simple but powerful lip scrub made with oil and sugar. This recipe is great because it only requires two ingredients and can be prepared in under 5 minutes. Shea butter is used in the second lip scrub. By far my fave lip scrub. The sugar gently exfoliates dry, cracked lips, while the butter hydrates and softens your lips.


 HOW TO PRESERVE A HOMEMADE LIP SCRUB:

If the lip scrub doesn't contain water, it will not need a preservative. You can add an antioxidant like vitamin E to extend the shelf life of the oil and butter. Vitamin E is not a preservative, so avoid getting water in your lip scrub.


 (BASIC LIP SCRUB) INGREDIENTS:

  • 2 TBSP White Sugar
  • 1 to 2 TBSP Carrier oil of choice (I used almond oil)
  • Optional: 2-3 Drops of flavor oil (I used watermelon)
  • Optional: 1-2 drops of pink or red food coloring


DIRECTIONS:

1.) Add the white sugar and carrier oil to a small bowl. Mix until the ingredients are well incorporated.

2.) Then add a few drops of food coloring and a few drops of flavoring oil. Mix until the food coloring is completely blended into the mixture.

3.) Transfer the scrub into a clean jar with a lid.


HOW TO USE:

1.) To use, scoop a tiny bit onto your fingertips and gently rub your lips in a circular motion.

2.) Rinse off with warm water.

3.) Apply a lip balm or coconut oil to your lips.

*Use this lip scrub once or twice a week.*


(SHEA BUTTER LIP SCRUB) FORMULA

(Heated Phase Ingredients)

  • 8g Shea Butter 
  • 12g Carrier oil of choice (I used jojoba oil)
(Cool Down Phase Ingredients)

  • 30g White Sugar
  • 0.25g Vitamin E
  • 2-3 drops of Flavor oil (I used strawberry)
  • Optional: 1-2 drops of pink or red food coloring


DIRECTIONS (HEATED PHASE)

1.) Add the shea butter and jojoba oil to a heat-proof container.

2.) Melt the ingredients in a double boiler by placing a bowl inside a small pot of boiling water.

3.) Remove from heat once the shea butter has melted.

DIRECTIONS (COOL DOWN PHASE)

1.) Once the heated phase has cooled down, add the rest of the ingredients.

2.) Mix to combine.

3.) Transfer the scrub into a clean jar with a lid.


HOW TO USE:

1.) To use, scoop a tiny bit onto your fingertips and gently rub your lips in a circular motion.

2.) Rinse off with warm water.

3.) Apply a lip balm or coconut oil to your lips.

*Use this lip scrub once or twice a week.*

CLICK HERE TO DOWNLOAD


Share
Tweet
Pin
Share
No comments
This homemade facial mask feels rich and luxurious. It's not just high in antioxidants, but it's also good at moisturizing the skin. This mask is made entirely of natural ingredients that will nurture your skin. It exfoliates softly, leaving your skin hydrated and rejuvenated.


WHAT IS HIBISCUS?

Hibiscus is a genus flowering plant in the Malvaceae family. The genus is vast, with several hundred species found in warm temperate, subtropical, and tropical climates around the world. For generations, the Hibiscus flower and leaves have been used traditionally for decorative and medicinal uses. It has been used to make extracts, drinks, and supplements. Personally, when I think of hibiscus, I think of Agua de Jamaica. A delicious beverage made from the petals of the hibiscus flower, which is quite popular in Mexico. But today, I'm going to share how to make a wonderful face mask using hibiscus powder. 


INGREDIENT BENEFITS:

HIBISCUS: Hibiscus-rich qualities keep skin nourished, soft, and youthful, preventing dry, dull skin. The antioxidants and beta-carotene found in Hibiscus are reasons it has been compared to Botox. Hibiscus contains vitamin C, which is a known complexion enhancer with collagen-boosting properties that help tighten the face. Making it firm for a youthful appearance. Hibiscus' natural surfactants help deep cleanse the skin without stripping it of its natural oils. Hibiscus contains alpha-hydroxy acids (AHAs), which help to eliminate dead cells and flaky skin. As well as clear pores.

ROSE: Roses are rich in vitamins, antioxidants, and minerals. Its anti-inflammatory properties help reduce redness and relieve irritation, making it perfect for all skin types due to its calming and healing properties. Roses brighten and tone the skin while also helping to maintain the skin's pH balance and controlling excess oil. Roses are rich in vitamins A and C, both of which can assist with aged skin. Apart from reducing the appearance of wrinkles, these vitamins help to diminish the appearance of age spots on the skin and help with collagen production.

ALOE VERA: Aloe vera contains a variety of antioxidants, including beta-carotene, vitamin C, and E, which can help improve skin firmness. It can also be used to hydrate and soothe the skin. Aloe vera moisturizes the skin without leaving it greasy, making it suitable for all skin types.  It contains anti-inflammatory properties that can help treat acne, eczema, and psoriasis.

RAW HONEY:  Honey is rich in antiseptic, antibacterial, and anti-inflammatory properties that can help clear up acne breakouts. Honey is a humectant, which means it helps your skin absorb and hold moisture, preventing it from drying out. It can also help reduce fine lines and wrinkles. Your skin will be soft, radiant, and shining after using raw honey.

VITAMIN E: Vitamin E is a moisturizing ingredient that functions as a humectant and an emollient, allowing water to be absorbed and trapped in the skin. It is also an antioxidant that helps fight free radical damage. Vitamin E can be used to prevent or treat dry, flaky skin. Vitamin E oil's hydrating properties may make skin appear more youthful and wrinkle-free.


INGREDIENT:
  • 1 tbsp hibiscus powder
  • 1 tbsp rose powder
  • 2-3 tbsp aloe vera gel
  • 1 tsp raw honey
  • 1/4 tsp vitamin e


WATCH THE VIDEO OR SKIP DOWN BELOW FOR THE STEP-BY-STEP GUIDE:


DIRECTIONS:

1.) If you don't have hibiscus powder or rose powder, you can make your own by grinding the dried flowers.
2.) Add the hibiscus powder, rose powder, aloe vera, raw honey, and vitamin e into a bowl.
3.) Mix to combine all the ingredients.


HOW TO USE:

1.) Before applying the mask, cleanse your skin.
2.) With a mask brush, apply the face mask to your entire face and leave it on for 10 minutes.
3.) Use a face cloth dipped in warm water to gently rub the mask off your face.
 4.) Follow up with a moisturizer.

(For gentle exfoliation, massage skin before rinsing off with warm water.)

NOTE: Use this Hibiscus face mask at least 2-3 a month, or whenever your skin needs a boost. Hibiscus will leave a stain on your clothes and towels, so wear clothes and use towels that can be stained.

CLICK TO DOWNLOAD


Share
Tweet
Pin
Share
1 comments

Make these rejuvenating under eye masks to get rid of puffy eyes and wrinkles beneath the eyes. The best part is that all of the ingredients can be found in your own kitchen.


Cucumber is one of the most refreshing, and cooling vegetables available. Did you know that they contain about 96 percent water? It is the most hydrating and calming ingredient for your skin because of its high water content. Cucumbers are high in vitamins and nutrients, that help moisturize and rejuvenate your skin. Three skin-boosting ingredients are used in the recipe I'm sharing with you today, along with a few cotton rounds.


INGREDIENT BENEFITS:

CUCUMBER: The vitamin C and folic acid found in cucumber juice not only minimizes swelling around the eyes. It can also soothe damaged skin and make your eyes look refreshed. Cucumber juice may also help your skin appear firmer and healthier. Cucumber is high in antioxidants, and antioxidants are a well-known element for fighting free radicals. It helps heal the damage caused by prolonged exposure to the sun's harmful UV rays. 

CHAMOMILE TEA: Chamomile contains polyphenols and phytochemicals, which are powerful antioxidants. It can help minimize signs of aging by protecting the skin from free radical damage. These nutrients can improve the look of fine lines, wrinkles, and scars by speeding up cell regeneration. Chamomile's antibacterial properties can help treat acne by reducing bacteria while preventing future breakouts. Chamomile’s anti-inflammatory and healing properties benefit those with sensitive skin. As well as those suffering from inflammatory conditions such as rosacea or eczema.

MINT LEAVES: Mint leaves can be used as a mild astringent to naturally tone the skin. It removes excess oil and dirt from the pores. As well as restoring the skin's suppleness and hydration. Mint contains salicylic acid and antibacterial properties. Both of which can help treat and prevent acne. Mint is an excellent source of antioxidants, which help to protect the skin from free radical damage and delay the appearance of wrinkles and fine lines. The richness of the antioxidants in mint leaves can help reduce dark circles beneath the eyes.


    INGREDIENTS:

    • Half a cucumber
    • 2 oz chamomile tea
    • A small batch of fresh mint leaves

    MATERIALS NEEDED:

    • Blender/Food processer
    • Bowl
    • Cotton rounds
    • Parchment paper
    • Resealable bag
    • Sieve
    • Sheet pan


    DIRECTIONS:

    1.) Steep the chamomile tea leaves in hot water for 3-4 minutes.

    2.) Meanwhile, cut the cucumber into slices or chunks.

    3.) Add the cucumber slices, chamomile tea, and mint leaves to the blender or food processor.

    4.) Blend the mixture until smooth.

    5.) Place a sieve over a bowl. Pour the mixture through the sieve to separate the pulp from the juice. 

    6.) Cut your cotton rounds in half. (This mask will require a lot of pairs, so cut more than you think you'll need.)

    7.) Transfer to a bowl, then soak the cotton rounds in the mixture. Then squeeze out the excess.

    8.) Place the eye masks on the sheet pan. Repeat until you've used up all of the cucumber juice.

    9.) Freeze the eye masks until solid, about 30 minutes. 

    10.) Then pull the frozen eye masks away from the sheet pan, and place them in a resealable bag in the freezer for future use.


    HOW TO USE:

    To apply, place the eye pads underneath the eyes. Leave on for 10–15 minutes.

    NOTE: Before using the eye pads, set them aside for 5-10 minutes but make sure they're still cool, as the temperature will help minimize puffiness.

        CLICK TO DOWNLOAD


    Share
    Tweet
    Pin
    Share
    1 comments

    Hair loss is a common issue that affects everyone at some point in their lives. This could be attributed to a variety of factors. Stress, as well as the use of excessive heat tools and certain hair products, are common causes. This rosemary-infused oil stimulates hair growth while also promoting a healthy scalp. The combination of the carrier oil and dried rosemary leaves makes this hair-growing oil an excellent addition to your natural hair care routine. All hair types and textures benefit from this oil treatment. It provides hair follicles a natural boost by increasing strength and elasticity. So, here's how to make your own rosemary oil to regrow your hair.


    ROSEMARY  BENEFITS:
    • Adds shine
    • Prevents dandruff
    • Prevents hair loss
    • Promotes hair growth
    • Strengthens hair
    • Thickens hair
    • Can slow down graying hair 

    CASTOR OIL:
    • Promotes shine
    • Prevents hair loss
    • Nourishes the scalp
    • Stimulates hair growth
    • Strengthens hair 


     INGREDIENTS:

    • Rosemary  (preferably dried)
    • Carrier oil of choice ( I used castor oil )
    • Sterilized container 

    WATCH THE VIDEO OR SKIP DOWN BELOW FOR THE STEP-BY-STEP GUIDE:


    DIRECTIONS:

    1.) If you're using fresh rosemary, wash it to remove any dirt and let it dry completely.
    2.) Once dry, bake it in the oven or hang it upside down for 2 weeks near a sunny window to dry.
    3.) Remove the leaves from the stem and place them in a container.
    4.) Pour the carrier oil over the rosemary and cover it with the lid.
    5.) Store the rosemary-infused oil in a dark place to allow the extract to ferment for 2-4 weeks.
    6.) Once the oil is ready, strain it into a clean jar and cover it with a lid.
    7.) Use the oil when needed.


    HOW TO USE IT FOR HAIR GROWTH:

    1.) Brush your hair beforehand to remove any knots or tangles before you start oiling it. This will simplify the process of applying the oil.
    2.) Apply the rosemary-infused oil on your scalp and massage in a circular motion for 5-10 minutes.
    3.) Distribute the remaining oil on your palms to the ends of your hair.
    4.) Cover with a shower cap and leave the oil on for 30 minutes to an hour.
    5.) Shampoo and condition your hair as usual.


        Click To Print    


    Share
    Tweet
    Pin
    Share
    No comments
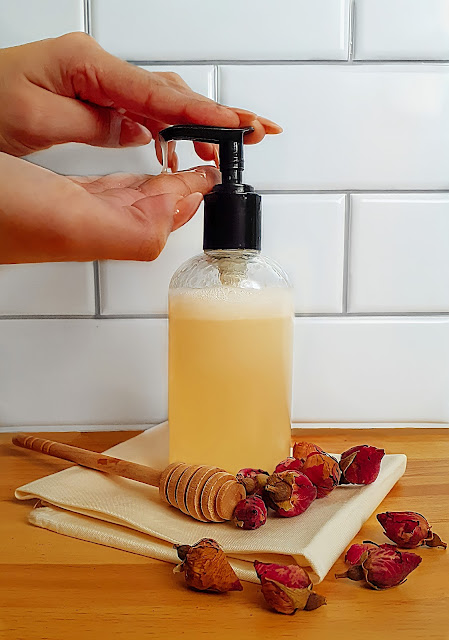
     A face wash has been something I've wanted to make for a long time, ever since I started making my own beauty products. The goal was to create a facial cleanser that anyone could easily make at home using ingredients they already have. I wanted to make a formula that was easy to make, natural, and suitable for all skin types. You'll love this honey & rose face wash, as it's mild and moisturizing without leaving a greasy residue.


    FACIAL CLEANSER INGREDIENT BENEFITS: 


    CASTILE SOAP: Castile soap is a natural cleanser made of vegetable-based oils that can hydrate and nourish the skin. It's safe for all skin types, including those with sensitive skin. Castile soap gently removes dirt build-up without drying out the skin. It can also help kill bacteria and prevent acne.


    RAW HONEY: Raw honey can deeply moisturize the skin, hydrate, reduce wrinkles, and improve skin elasticity. Its anti-bacterial and anti-inflammatory properties can help heal acne and minimize breakouts.  Honey can also be used to soothe the skin, unclog pores, and remove excess oil.

    ROSEWATER: Rosewater is well-known for its ability to balance the pH of the skin as well as its pleasant scent. It contains anti-inflammatory properties that can help reduce puffiness and redness. Meanwhile, helping to soothe and calm the skin. The anti-bacterial properties found in rosewater can help treat acne. It can also help to reduce the visibility of fine lines and wrinkles.

    RECOMMENDED CARRIER OILS:

    ALMOND OIL (FOR DRY SKIN): Almond oil is full of vitamin A (retinol) which can help even out the skin tone, improve complexion, and smooth fine lines. The vitamin E found in almond oil can help protect your skin from UV radiation.  Almond oil works well as a moisturizer. It will keep your skin glowing throughout the day.

    JOJOBA OIL (FOR OILY SKIN): Jojoba oil can help keep your skin hydrated and moisturized without leaving a heavy residue behind. The anti-inflammatory properties found in jojoba oil can help heal mild acne and prevent breakouts. It can also help minimize the appearance of fine lines and wrinkles,

     INGREDIENTS:

    • 1 cup castile soap
    • 2 tbsp raw honey
    • 2 tbsp rose water
    • 2 tbsp sweet almond oil for dry skin (jojoba oil for oily skin)
    • 5-10 drops of rose essential oil or geranium essential oil for fragrance


    (WATCH THE VIDEO DOWN BELOW TO LEARN HOW TO MAKE TO A HONEY & ROSE FACIAL CLEANSER.)

    DIRECTIONS:

    1.) In a soap dispenser, add the castile soap, rosewater, raw honey, almond oil, and drops of rose essential oil.

    2.) Shake the bottle until well incorporated.

    HOW TO USE:

    1.) Pump a small amount into your hand. Massage the cleanser to the face in circular motions.

    2.) Rinse the cleanser off and pat dry.

    DOES THIS RECIPE NEED A PRESERVATIVE?

    This facial cleanser contains rosewater so it does require a preservative. Since we made a small batch, "technically," you don't have to use one. Just as long as you use it within a month. However, to be on the safe side, you should use a preservative. 


        Click To Print    

    Share
    Tweet
    Pin
    Share
    No comments


     Make your own Himalayan foot scrub using 4 ingredients. This scrub is perfect for removing dry, rough, and cracked skin. Exfoliating regularly is a great way to revitalize your feet, and thanks to the coconut oil used in this recipe, your feet will feel nourished, soft, and moisturized. I love using this foot scrub year-round, and since Christmas is right around the corner, I wanted to share this recipe just in case any of you needed a last-minute gift. 

    FOOT SCRUB INGREDIENT BENEFITS: 

    HIMALAYAN SALT: The Himalayan salt will be used in this recipe to naturally exfoliate and remove dead skin. It contains minerals to help soften and restore hydration. Himalayan salt has natural properties that detoxify the skin. It also contains magnesium that can help reduce inflammation.

    COCONUT OIL: Coconut oil has antibacterial, anti-inflammatory, and anti-fungal properties. It also contains fatty acids that help nourish, hydrate, and protect the skin. That's why I like to add coconut oil to my exfoliating scrubs. Its emollient properties help repair the skin's barrier. Meanwhile, the antimicrobial properties kill off bacteria.

    CASTILE SOAP: Castile soap is a non-toxic mild cleanser that is gentle on the skin because it's made of hydrating plant oils. It's safe to use for sensitive skin, as it won't strip your skin's natural oils or cause irritation. Castile soap can help reduce inflammation and contains antibacterial properties.

    LAVENDER OIL: Besides its wonderful fragrance, lavender oil is known for its calming and relaxing abilities. It can also kill off bacteria and reduce inflammation.


    INGREDIENTS:

    • 1 cup of Himalayan salt (fine)
    • 1/4 cup coconut oil or olive oil
    • 1 tsp castile soap
    • 5-10 drops lavender essential oil
    • (optional) a pinch of mica powder to color the scrub.


    (WATCH THE VIDEO DOWN BELOW TO LEARN HOW TO MAKE A LAVENDER FOOT SCRUB.)

    DIRECTIONS:


    1.) In a bowl, add the Himalayan salt, coconut oil, castile soap, and drops of lavender oil.
    2.) Stir to mix all of the ingredients.
    3.) (Optional) To add color, add a pinch of purple mica powder.
    4.) Transfer to an air-tight container.


    HOW TO USE THE SCRUB IN A PEDICURE:


    1.) Fill a large bowl with warm water and add a tbsp of the lavender foot scrub. 
    2.) Dip your feet in the prepared foot bath and allow them to soak for 10 minutes.
    3.) Bring one foot out at a time and place a dap of the scrub onto the feet.
    4.) Massage the scrub, focusing on the areas that are cracked to remove the dead skin and calluses.
    5.) After a few minutes, rinse the scrub and dry your feet.
    6.) Apply a moisturizer, and you're done!


    DOES THIS FOOT SCRUB NEED A PRESERVATIVE?

    This recipe doesn't contain water so it doesn't require a preservative.  It's important to note that whoever uses it makes sure no water gets into the scrub. As water can contaminate the product, causing bacteria and the growth of mold. It's best to use this foot scrub after the shower or for a pedicure.


        Click To Print    


    Share
    Tweet
    Pin
    Share
    No comments

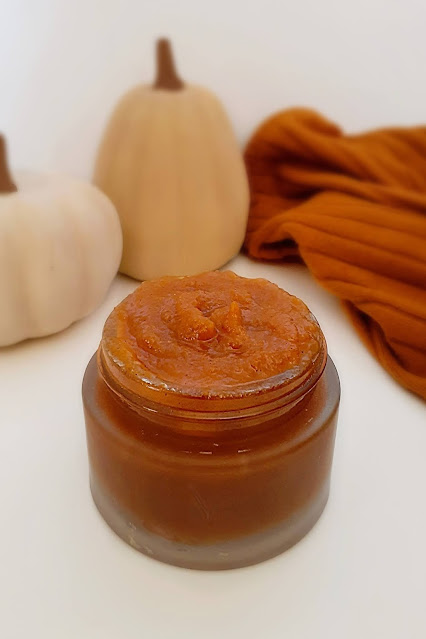
     I mentioned in a previous post, I love the autumn season, and pumpkins are no exception. Pumpkin lattes and pumpkin-scented fragrances are some of the many things I enjoy about fall. Today, I'll be sharing how I made a pumpkin exfoliating facial scrub. Pumpkins are packed in vitamins and antioxidants that help beautify the skin. When mixed with brown sugar, you get an amazing face scrub that helps you get rid of dead skin cells and improves the overall texture of your skin.


    PUMPKIN FACE SCRUB INGREDIENT  BENEFITS:

    PUMPKIN: Pumpkins contain vitamins A, C, E, and antioxidants that help fight against free radicals. Pumpkins boost collagen production, which helps minimize wrinkles and fine lines. It also contains magnesium, potassium, and zinc, which combats redness and regulates oil production. It reduces inflammation, helps treat acne, and can improve skin texture.

    RAW HONEY: Honey is a natural antibacterial that helps treat acne and is rich in antioxidants that slow down aging. It moisturizes your skin and leaves a nice glow to your complexion.

    COCONUT OIL: Coconut oil has many benefits for the skin. It reduces inflammation, it's antibacterial, antifungal, and has antioxidants properties that slow down aging. It also contains vitamin E that helps keep the skin healthy and smooth. 

    CINNAMON: Cinnamon is known for improving blood flow, circulation, it's antifungal, it contains antioxidants and antibacterial properties. 

    BROWN SUGAR: Brown sugar is a natural ingredient that will gently remove dead skin.


    INGREDIENTS:

    • 3 tbsp brown sugar
    • 2 tbsp pumpkin puree
    • 1 tsp raw honey
    • 1/2 tsp coconut oil (for dry skin) or jojoba oil (for oily skin)
    • 1/4 tsp cinnamon 


    DIRECTIONS:

    1.) In a bowl, add the brown sugar, pumpkin puree, cinnamon, and mix to combine.
    2.) Add the coconut oil, the raw honey, and mix all of the ingredients together.


    HOW TO USE:

    1.) Gently exfoliate the pumpkin scrub in a circular motion. Rinse with warm water, and moisturize afterward if needed.


    Share
    Tweet
    Pin
    Share
    No comments


    Ever since I incorporated facial serums into my skincare routine, I've noticed how much healthier and glowy my complexion looks. Facial serums do wonders for the skin, especially dry and mature skin because they are loaded with vitamins that hydrate and rejuvenate the skin. Regardless of your skin type, anyone can use anti-aging serums. As long as you're using one that's meant for your skin type.


    ROSEHIP OIL: Rosehip oil isn't only moisturizing but is rich in essential fatty acids which are great for fighting dry skin. It contains vitamin C, which boosts collagen and it's anti-aging.

    AVOCADO OIL: Just like rosehip oil, avocado oil helps lessen the appearance of wrinkles. It contains essential fatty acids, potassium, vitamin A, D, E, and other nutrients that nourish the skin. 

    VITAMIN E OIL: Vitamin E oil can help treat dry and flaky skin. It's also known for rejuvenating and making the skin look youthful because of its many nutrient benefits.

    ROSE ESSENTIAL OIL: Besides smelling amazing, rose essential oil has a variety of benefits for the skin. It's loaded with vitamins that help hydrate dry skin. It helps combat acne, inflammation, redness, wrinkles, and fine lines.


    INGREDIENTS:

    • 2 tbsp Rosehip oil
    • 2 tbsp Avocado oil
    • 1 tbsp Vitamin E oil
    • OPTIONAL: 2-4 drops rose essential oil


    DIRECTIONS:

    1.) In a glass container, add rosehip oil, avocado oil, and vitamin E.

    2.) Add a few drops of rose essential oil and shake the bottle to combine.


    HOW TO USE:

    Add a few drops of the serum to your fingertips and gently pat beneath the eyes. Follow up with a moisturizer. You can use this serum every night before going to bed and during the day.

    Share
    Tweet
    Pin
    Share
    No comments

    Making your own exfoliating lip scrub is easier than you'd think. Today, I'm going to share one of my favorite recipes. You only need 5 ingredients and about 5 minutes of your time to create the perfect sugar scrub for your lips. I love using lip scrubs once or twice a week to remove dead skin cells, dried, and cracked lips. All while moisturizing my lips all at the same time. If you are interested in making it, follow my step-by-step guide below.


     INGREDIENTS:

    • 3 tbsp sugar
    • 1 tbsp coconut oil (or any other oil of choice)
    • 1 tsp honey
    • 1/4 tsp vanilla extract
    • 1 drop of red or pink food coloring
    • (Optional) a few drops of flavor oil


    DIRECTIONS:

    1.) Add the sugar, coconut oil, honey, and vanilla extract to a bowl.

    2.) Mix everything well to combine.

    3.) Add the drop of food coloring and mix until well incorporated.

    4.) Store the lip scrub in an airtight container.


    HOW TO USE:

    1.) Wet your lips and apply the lip scrub on your lips.

    2.) Gently massage the lip scrub in small circular motions.

    3.) Rinse with water and pat dry.

    4.) Apply your favorite lip balm.

    Share
    Tweet
    Pin
    Share
    No comments

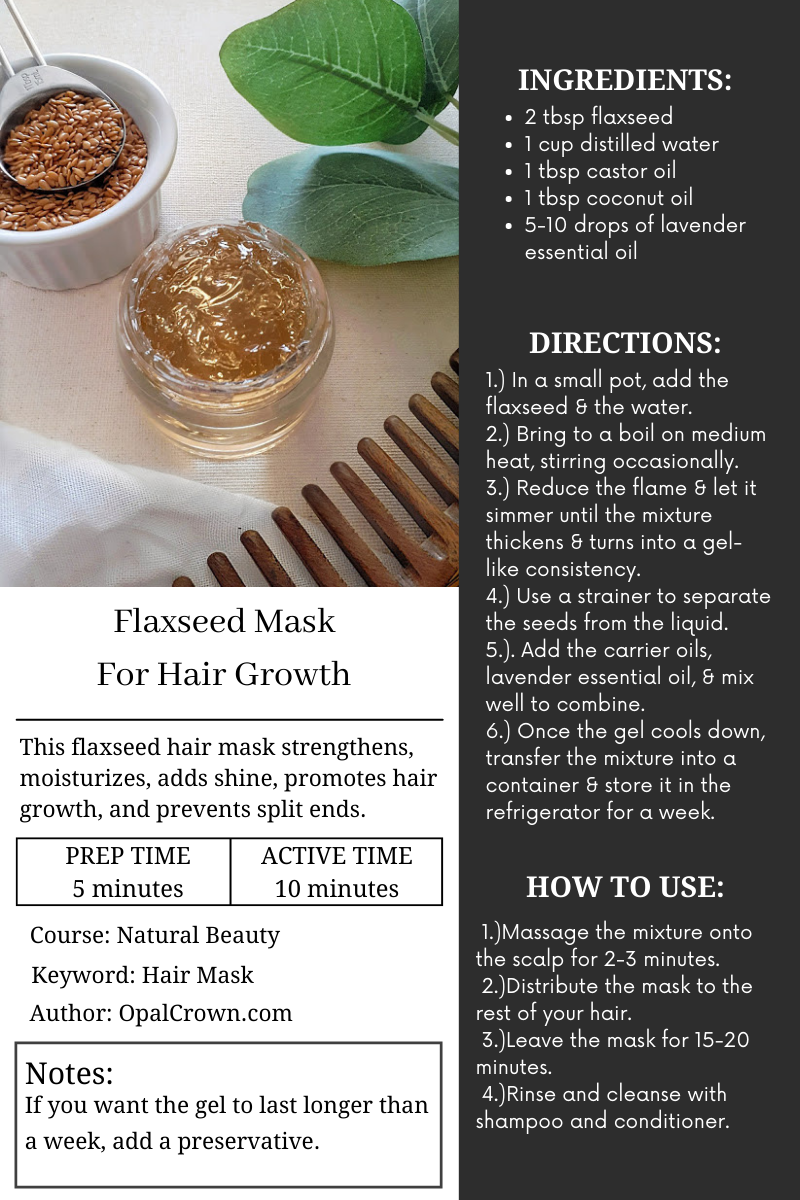
     Ever since I stopped using heat on my hair and focused on growing it out, I'm more conscious of what products I use on my hair. It's been almost 3 months since I started to embrace my natural wavy locks. I've read many articles that rave about flaxseed gel and have seen many videos of women applying the gel to their hair. After all the research I did on flaxseed, I learned all of the amazing benefits that it contains. I decided to try it out and was pleased by how much healthier and stronger my hair feels and looks. I show you two different methods on how to use the flaxseed gel and how to make it.


    FLAXSEED: Flaxseed is rich in omega 3-fatty acids and proteins that can reduce inflammation and increase blood circulation. It contains B vitamins which are known for strengthening the hair follicle. It makes the hair stronger, healthier, and shinner. It also contains vitamin E, which reduces free radicals on the scalp, increases shine, promotes hair growth, and prevents split ends.

    CASTOR OIL: Castor oil contains vitamin E, omega 6-fatty acids,  and many more nutrients that can help improve the condition of your hair. When massaged onto the scalp, castor oil can increase blood circulation and promote hair growth. It is also known for minimizing damaged hair, reducing dandruff, and can moisturize dry hair.

    COCONUT OIL: Coconut oil is high in vitamins E, B12, zinc, and iron that can help boost hair growth. It can help prevent a dry and flaky scalp, as well as treat dandruff. Coconut oil increases shine, strengthens the hair, reduces split ends and breakage.

    LAVENDER OIL: Lavender oil increases hair growth, prevents thinning, hair fall, and hair breakage. It contains antimicrobial properties that can help prevent bacteria, an itchy scalp, and dandruff. 


    INGREDIENTS:

    • 2 tbsp flaxseed
    • 1 cup distilled water
    • 1 tbsp castor oil
    • 1 tbsp coconut oil
    • 5-10 drops of lavender essential oil


    DIRECTIONS:

    1.) In a small pot, add the flaxseed and the water.
    2.) Bring it to a boil on medium heat, stirring occasionally. 
    3.) Reduce the flame and let it simmer until the mixture thickens and turns into a gel-like consistency.
    4.) Separate the water from the flaxseed with a strainer.
    5.). Add the castor oil, coconut oil, lavender essential oil, and mix well to combine.
    6.) Once the gel cools down, transfer the mixture into a container, and store it in the refrigerator for a week. 


    NOTE:
    *If you want the gel to last longer than a week, add a preservative.*


    HOW TO USE IT AS A HAIR MASK:

     1.)Massage the mixture onto the scalp for 2-3 minutes. 
     2.)Distribute the mask to the rest of your hair.
     3.)Leave the mask for 15-20 minutes.
     4.)Rinse and cleanse with shampoo and conditioner.


    HOW TO USE IT AS A HAIR GEL:

    1.)Apply a small amount of the gel to freshly washed hair and style as you normally would.
    2.)You can also apply the gel on second-day hair to freshen up your waves/curls.


        Click To Print    


    Share
    Tweet
    Pin
    Share
    No comments
    Older Posts

    About me


    Hi there! My name is Stefany. I am the writer and creator of Opal Crown. a crafty blog that covers DIY projects, beauty, fashion, decor, lifestyle, sustainability, and much more.

    Subscribe For Weekly Updates

    * indicates required

    Popular Posts

    • Fringed Tassel Earrings
    • DIY HAIR & SCALP DETOX MASK (+ How to use it)
    • DIY Flaxseed Mask For Hair Growth
    • DIY Beaded Phone Charm
    • How to make rice water for hair growth
    • DIY ROPE PLACEMATS WITH FRINGE
    • DIY Aloe Vera Mask For Glowing Skin
    • DIY Police Officer Costume For Halloween

    Featured Post

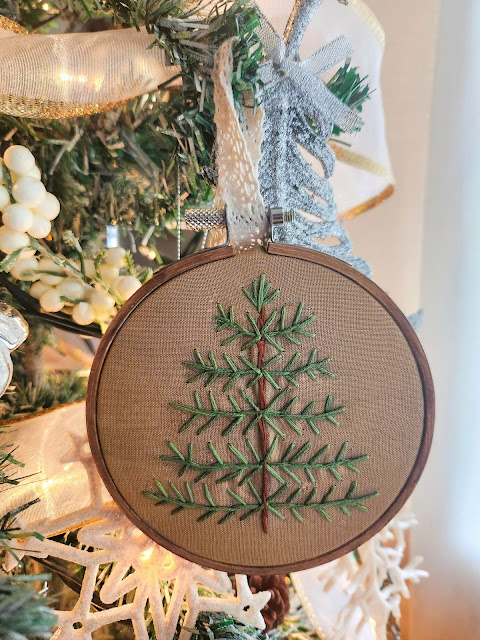
    DIY Embroidered Christmas Ornaments

    Are you looking for a unique gift idea or new, adorable ornaments to hang on your tree this year?   I have the answer—embroidered ornaments!...

    Click To Download

    Click To Download
    Stay focused and organized throughout the day with a daily planner to help you stay on track with your daily tasks. There are 3 different styles to choose from.

    Follow Us

    • instagram
    • pinterest
    • youtube
    • tik tok

    Created with by ThemeXpose | Distributed by Blogger Templates