• Home
  • Beauty
    • ALL BEAUTY
    • SKIN CARE
    • HAIR CARE
    • BODY CARE
    • NAIL CARE
    • BEAUTY TIPS
  • FASHION
    • ALL FASHION
    • DIY STYLE
    • DIY ACCESSORIES
  • Eco-friendly
    • ALL ECO
    • ZEROWASTE HOME
    • ZEROWASTE BEAUTY
    • UPCYCLE STLYE
  • Decor
    • ALL DECOR
    • DIY DECOR
    • WALL ART
    • UPCYCLE DECOR
    • CRAFTS
    • DIY FESTIVE
  • SEWING
    • ALL SEW
    • SEW STYLE
    • SEW ECO
    • SEW PROJECTS
  • Holiday
    • ALL FESTIVE
    • DIY CHRISTMAS
    • DIY AUTUMN
    • DIY HALLOWEEN
    • VALENTINE'S DAY
    • GIFTS
  • Dine
  • LIFESTYLE
  • Contact
  • Collaborate
  • Subscribe
  • POLICY
Powered by Blogger.

Opal Crown


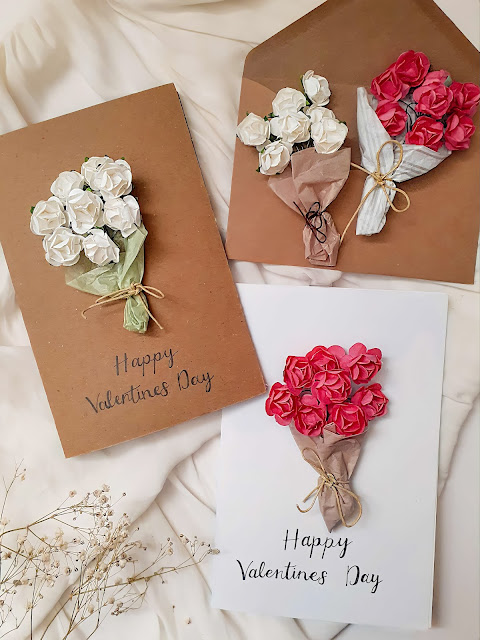
If you're looking for a beautiful Valentine's Day card to gift to your significant other or to your family and friends. There's no need to look any farther because you've come to the right spot. This floral bouquet card is easy to make and will delight anybody you give it to. This homemade card is perfect for a birthday or a Mother's Day present. No matter the occasion, this lovely card will brighten anyone's day.
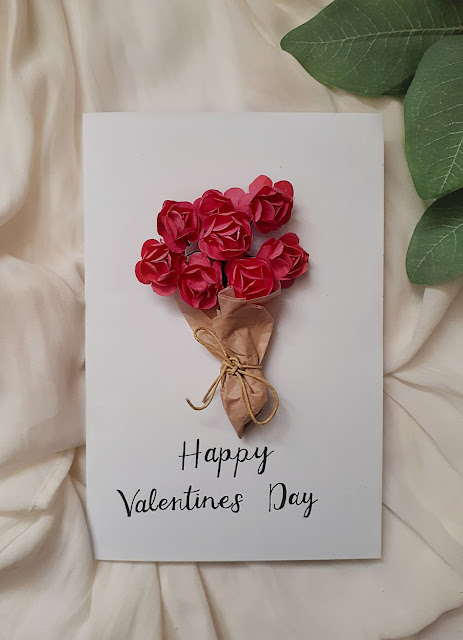


MATERIALS NEEDED:

  • Cardstock
  • Mini bouquet of flowers
  • String or Twine
  • Tissue paper


(WATCH THE VIDEO TUTORIAL DOWN BELOW OR CONTINUE FOR THE STEP-BY-STEP PICTURE TUTORIAL.)

DIRECTIONS:

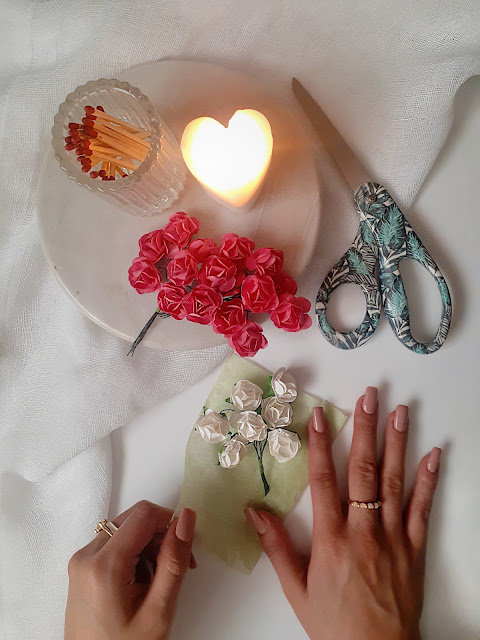
1.) Cut a piece of tissue paper slightly larger than the bouquet of flowers.
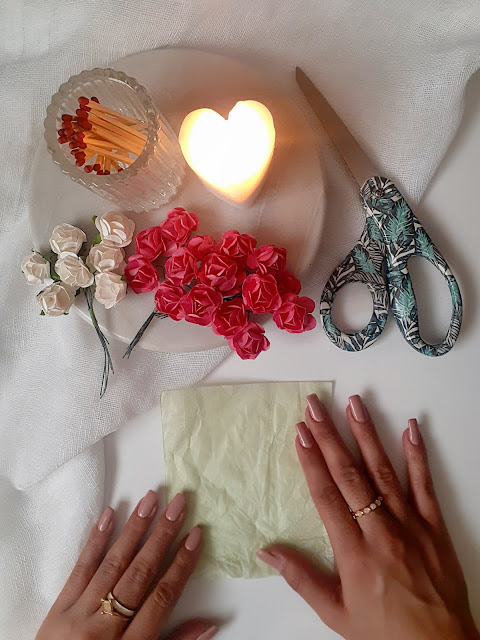
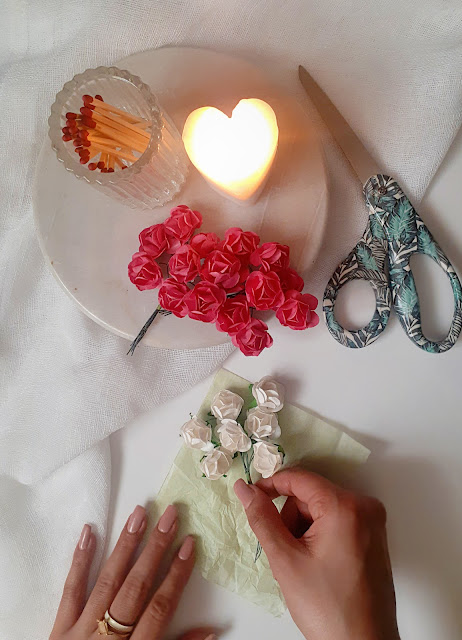


2.) Arrange the flowers in a diagonal pattern on the tissue paper.


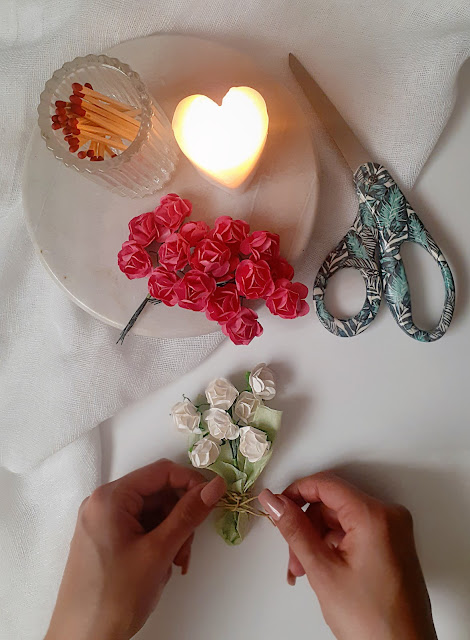
3.) Gently wrap the bouquet in the tissue paper


4.) Tie a piece of string or twine around the wrapped bouquet.


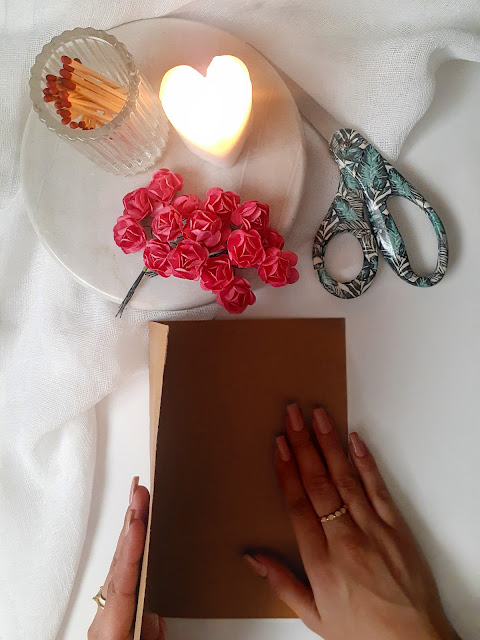
5.) Fold a sheet of cardstock in half to make the card.


6.) Glue the bouquet to the front of the card.


7.) Feel free to add a personal message to the card.


Share
Tweet
Pin
Share
No comments


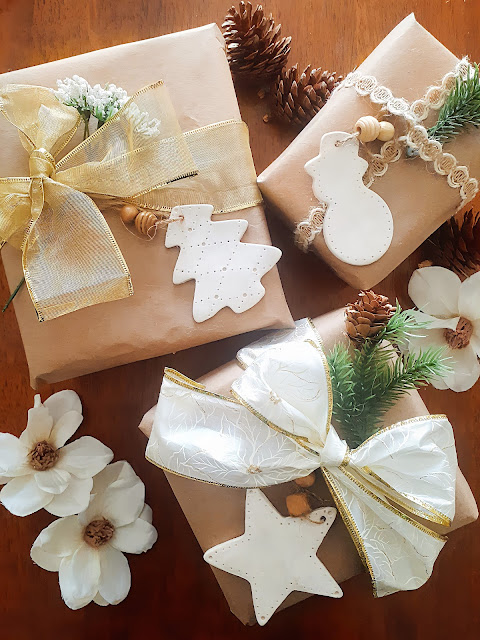
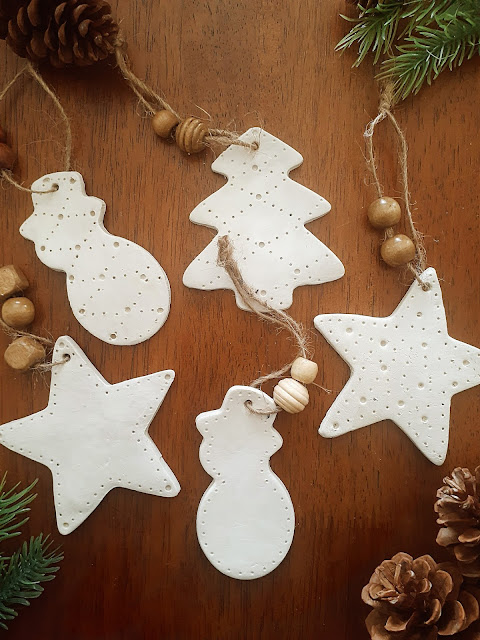
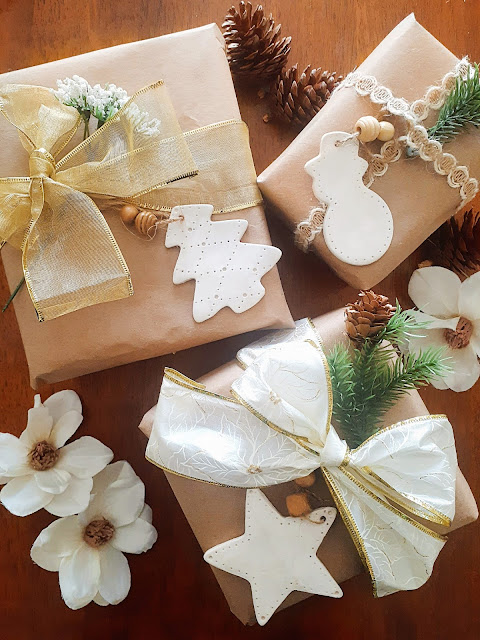
This year for Christmas, I decided to make gift tags that can double as ornaments for everyone in my family. This is an opportunity to let the kids join in on the project and share a special moment together. Making tags out of clay is ridiculously easy, and once you learn how to make them, you'll want to gift them to everyone you know.


MATERIALS NEEDED:

  • Air dry modeling clay
  • Rolling pin or glass cup
  • Cookie cutters
  • Yarn or twine
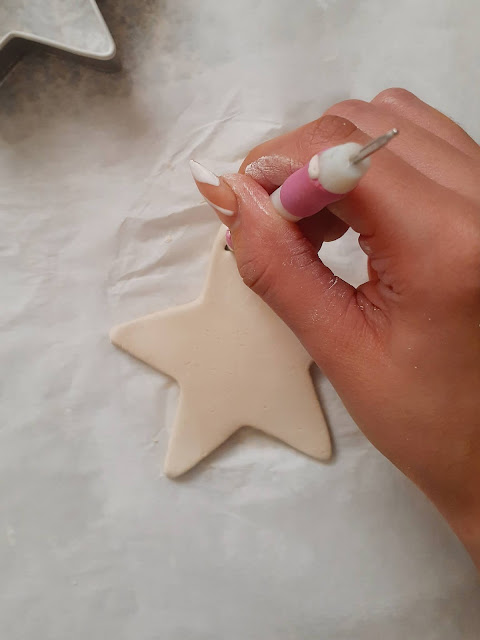
  • Skewer (or anything pointy to make the holes)
  • Sculpey glaze


DIRECTIONS:

1.) Tear off a chunk of the clay and warm up by working with your hands.
2.) Roll out the clay to your desired thickness.
3.) Use cookie cutters to cut the shapes you want.


4.)  Carefully remove the excess clay. 
5.) Use anything pointy to poke a small hole on the top of each shape.


6.) To smooth out any areas, use a bit of water and your fingertips.
7.) Allow the tags to dry for 24-48 hours
8.) Once dried, tie them to your gifts with yarn or twine.


Share
Tweet
Pin
Share
1 comments


A sustainable alternative to gift wrapping is furoshiki. Which is a traditional Japanese wrapping cloth used to wrap gifts or carry belongings. The type of fabric that is most commonly used is cotton, silk, nylon, or rayon. I love using fabric instead of single-use gift wraps to reduce waste. Cloth wrapping doesn't only look gorgeous, but it can last a very long time. You can use various pattern designs or colors depending on who you are planning on gifting it to. I wanted to make the fabric wrap using materials I already had at home. I found these beautiful fabric scraps I've used in previous projects. They were perfect and came out better than I expected.


MATERIALS:

  • Fabric 
  • Scissors
  • Needle & thread or sewing machine
  • Optional: greenery or flowers


DIRECTIONS:

1.) Cut the fabric to your desired size or depending on the size of your gift. (Mine measures 60 by 60 cm.)


2.) With the right side facing down, fold and press half an inch from the edge. 


3.) Fold and press the edge again. (Do this to each side.)


4.) Pin the edges so they won't unfold.


5.) Sew using a straight stitch by hand or with a sewing machine. 


6.) Do this to each side, and you are done!


7.) Decorate the gift with greenery or dried flowers.


Share
Tweet
Pin
Share
5 comments


Halloween is right around the corner, and even though I wasn't able to get ahold of pumpkins until today, I still wanted to share with you guys an easy DIY. The best part, no carving is required, which means no mess! All you'll need is a couple of paintbrushes and some paint to tackle this project. This year, I went for a non-traditional pumpkin design and opted for floral and greenery, but you can paint any design you'd prefer. After Halloween is over, I'm definitely going to continue displaying the pumpkins until the end of fall. 


MATERIALS NEEDED:

  • Pumpkins
  • Paint
  • Paintbrushes


DIRECTIONS:
 
1.) Since I'm not a fan of orange, I started off by painting the pumpkin white.


2.) Once the paint dried, I painted 3 circles to create the roses.


3.) To make the petals, I used a shade darker than the roses. I started in the center of the circle and paint curved shapes.


4.) To finish the pumpkin, I went ahead and painted the stem gold. 


5.) For the second pumpkin, I painted random stems and leaves to achieve a natural look.


6.) To add detail to the leaves, I used a lighter shade of green. Once it dried, I painted the stem gold.


Share
Tweet
Pin
Share
No comments

 Whether you celebrate Halloween, the Day of the Dead, or both, this DIY sugar skull decor is perfect for both holidays. I've always been a fan of Halloween, I always look forward to decorating my home with pumpkins, skulls, and anything spooky. For this year, in particular, I wanted to switch up the theme and go for something less traditional and more colorful. Every year on November 1st, I always celebrate the Day of the Dead. Inspired by this beautiful tradition, I'll be decorating my home with sugar skulls and bright colorful decorations for Halloween.


WHAT IS THE DAY OF THE DEAD (DIA DE MUERTOS)?

The Day of the Dead (Dia de Muertos) is a holiday that's celebrated annually throughout Mexico on the 1st and 2nd of November. Family and friends gather to honor their family members who have passed away. Families create altars, known as (ofrendas,) which are often decorated with vibrant colors, flowers, sugar skulls, banners, candles, food, and pictures of the departed.


MATERIALS NEEDED:

  • Skull 
  • Flowers
  • Acrylic Paint
  • Paintbrushes
  • Hot Glue Gun

DIRECTIONS:

1.) I painted the skull with white acrylic paint twice and allowed each coat to dry in between.


2.) Once the paint dried completely, I painted the inside of the skull's eyes and nose black.


3.) The design I was going for was simple yet traditional. I grabbed several different colors and painted flowers around the skull's eyes, swirls, dots, and a heart to finish off the design. Feel free to get creative and paint anything that comes to mind.


4.) When the paint dried, I added a layer of mod podge to seal the design.


5.) To finish the sugar skull, I hot glued some flowers on the skull's head to create a crown.


Share
Tweet
Pin
Share
No comments

How To Make A Christmas Wreath 2 Ways To Display


Christmas is finally approaching us one of the happiest times of the year. I couldn't wait to share with you guys my first Christmas DIY of the month, and what better way to get crafting, than with a simple, cute, and affordable wreath. Using all items from the dollar store. This mini festive wreath only cost me 4 dollars, so if you want to learn how I made it check down below for the full tutorial.


SUPPLIES USED: 

  • Mini Wreath 
  • 1 Red Berry
  • 2 Green Pines
  • Adhesive of Choice ( I used a hot glue gun)
  • Wire or String (to hang the wreath)


INSTRUCTION:


1. Remove the green pines and red berries from their steam, if you haven't done so already.


2. Glue each individual green pine on the wreath until it's fully covered.


3. Then add the berries for extra dimension and allow it to dry completely. It should only take a few minutes since the hot glue dries pretty quickly.


4. To hang the wreath, tie a string on both sides. Now it's ready to hang.


It looks great! 


5. If you'd rather display it as a centerpiece skip step #4. Add some candles in the center and you are all finished!


That's it for today guys, thank you so much for stopping by. Happy holidays everyone, until next time...


Share
Tweet
Pin
Share
No comments
Older Posts

About me


Hi there! My name is Stefany. I am the writer and creator of Opal Crown. a crafty blog that covers DIY projects, beauty, fashion, decor, lifestyle, sustainability, and much more.

Subscribe For Weekly Updates

* indicates required

Popular Posts

  • Fringed Tassel Earrings
  • DIY Flaxseed Mask For Hair Growth
  • How to make rice water for hair growth
  • DIY Bandana Halter Top
  • DIY Beaded Phone Charm
  • DIY Rose Petal Body Scrub
  • DIY HAIR & SCALP DETOX MASK (+ How to use it)
  • DIY Aloe Vera Mask For Glowing Skin

Featured Post

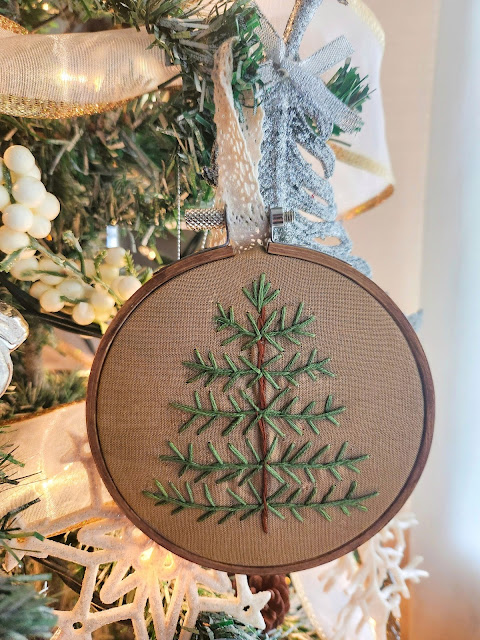
DIY Embroidered Christmas Ornaments

Are you looking for a unique gift idea or new, adorable ornaments to hang on your tree this year?   I have the answer—embroidered ornaments!...

Click To Download

Click To Download
Stay focused and organized throughout the day with a daily planner to help you stay on track with your daily tasks. There are 3 different styles to choose from.

Follow Us

  • instagram
  • pinterest
  • youtube
  • tik tok

Created with by ThemeXpose | Distributed by Blogger Templates