• Home
  • Beauty
    • ALL BEAUTY
    • SKIN CARE
    • HAIR CARE
    • BODY CARE
    • NAIL CARE
    • BEAUTY TIPS
  • FASHION
    • ALL FASHION
    • DIY STYLE
    • DIY ACCESSORIES
  • Eco-friendly
    • ALL ECO
    • ZEROWASTE HOME
    • ZEROWASTE BEAUTY
    • UPCYCLE STLYE
  • Decor
    • ALL DECOR
    • DIY DECOR
    • WALL ART
    • UPCYCLE DECOR
    • CRAFTS
    • DIY FESTIVE
  • SEWING
    • ALL SEW
    • SEW STYLE
    • SEW ECO
    • SEW PROJECTS
  • Holiday
    • ALL FESTIVE
    • DIY CHRISTMAS
    • DIY AUTUMN
    • DIY HALLOWEEN
    • VALENTINE'S DAY
    • GIFTS
  • Dine
  • LIFESTYLE
  • Contact
  • Collaborate
  • Subscribe
  • POLICY
Powered by Blogger.

Opal Crown

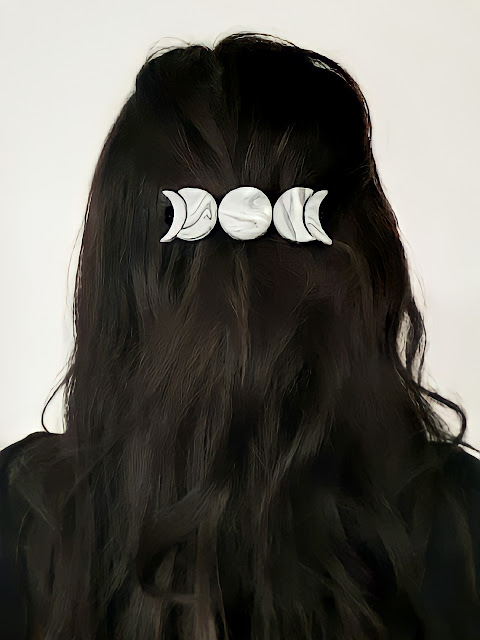
 Hair accessories are a simple way of spicing up any hairdo. Since I'm always on the go, I find myself using claw clips or scrunchies to get my hair out of my face basically all the time. I tend to gravitate towards the same hair accessories and use them over and over again. I wanted to shake up my hairstyles by making my own hair clips using polymer clay. Because I'm a moon fanatic, I wanted to create a moon phase barrette. I loved how it turned out, and honestly cannot wait to make more for my family and friends.


MATERIALS NEEDED:

  • 3 different colored polymer clay
  • rolling pin
  • soda cap or anything round
  • X-Acto knife
  • hair clips or barrettes
  • adhesive of choice


DIRECTIONS:

1.) Pick 3 complementary colors and roll each clay into a snake.


2.) Combine the 3 clays by twisting and rolling until you achieve a marble effect.


3.) Roll the clay into a ball and flatten it using a rolling pin.

4.) Use anything round to cut the clay into 5 circles.

5.) Set aside one of the circles as that will be the full moon. 

  • Cut the rest of the circles the shape of all the moon phases. (You should end up with 1 full moon, 2 gibbous moons, and 2 crescent moons.)


6.) Bake the clay in the oven according to the instructions on the clay package.

7.) Allow the clay to cool for 10-15 minutes.

8.) Once cooled, use glue to attach each moon to the barrettes.


Share
Tweet
Pin
Share
No comments
Older Posts

About me


Hi there! My name is Stefany. I am the writer and creator of Opal Crown. a crafty blog that covers DIY projects, beauty, fashion, decor, lifestyle, sustainability, and much more.

Subscribe For Weekly Updates

* indicates required

Popular Posts

  • DIY Flaxseed Mask For Hair Growth
  • DIY Beaded Phone Charm
  • Fringed Tassel Earrings
  • How to make rice water for hair growth
  • DIY Rose Petal Body Scrub
  • Thrifted Scalloped Glass Bowl Makeover
  • DIY HAIR & SCALP DETOX MASK (+ How to use it)
  • DIY Bandana Halter Top

Featured Post

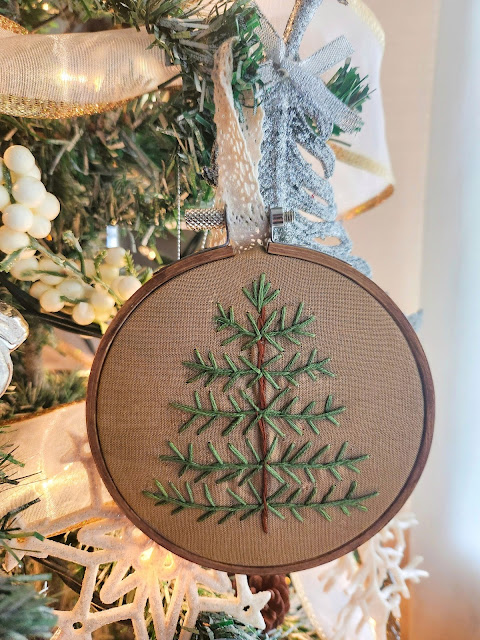
DIY Embroidered Christmas Ornaments

Are you looking for a unique gift idea or new, adorable ornaments to hang on your tree this year?   I have the answer—embroidered ornaments!...

Click To Download

Click To Download
Stay focused and organized throughout the day with a daily planner to help you stay on track with your daily tasks. There are 3 different styles to choose from.

Follow Us

  • instagram
  • pinterest
  • youtube
  • tik tok

Created with by ThemeXpose | Distributed by Blogger Templates