• Home
  • Beauty
    • ALL BEAUTY
    • SKIN CARE
    • HAIR CARE
    • BODY CARE
    • NAIL CARE
    • BEAUTY TIPS
  • FASHION
    • ALL FASHION
    • DIY STYLE
    • DIY ACCESSORIES
  • Eco-friendly
    • ALL ECO
    • ZEROWASTE HOME
    • ZEROWASTE BEAUTY
    • UPCYCLE STLYE
  • Decor
    • ALL DECOR
    • DIY DECOR
    • WALL ART
    • UPCYCLE DECOR
    • CRAFTS
    • DIY FESTIVE
  • SEWING
    • ALL SEW
    • SEW STYLE
    • SEW ECO
    • SEW PROJECTS
  • Holiday
    • ALL FESTIVE
    • DIY CHRISTMAS
    • DIY AUTUMN
    • DIY HALLOWEEN
    • VALENTINE'S DAY
    • GIFTS
  • Dine
  • LIFESTYLE
  • Contact
  • Collaborate
  • Subscribe
  • POLICY
Powered by Blogger.

Opal Crown


 Make your own Himalayan foot scrub using 4 ingredients. This scrub is perfect for removing dry, rough, and cracked skin. Exfoliating regularly is a great way to revitalize your feet, and thanks to the coconut oil used in this recipe, your feet will feel nourished, soft, and moisturized. I love using this foot scrub year-round, and since Christmas is right around the corner, I wanted to share this recipe just in case any of you needed a last-minute gift. 

FOOT SCRUB INGREDIENT BENEFITS: 

HIMALAYAN SALT: The Himalayan salt will be used in this recipe to naturally exfoliate and remove dead skin. It contains minerals to help soften and restore hydration. Himalayan salt has natural properties that detoxify the skin. It also contains magnesium that can help reduce inflammation.

COCONUT OIL: Coconut oil has antibacterial, anti-inflammatory, and anti-fungal properties. It also contains fatty acids that help nourish, hydrate, and protect the skin. That's why I like to add coconut oil to my exfoliating scrubs. Its emollient properties help repair the skin's barrier. Meanwhile, the antimicrobial properties kill off bacteria.

CASTILE SOAP: Castile soap is a non-toxic mild cleanser that is gentle on the skin because it's made of hydrating plant oils. It's safe to use for sensitive skin, as it won't strip your skin's natural oils or cause irritation. Castile soap can help reduce inflammation and contains antibacterial properties.

LAVENDER OIL: Besides its wonderful fragrance, lavender oil is known for its calming and relaxing abilities. It can also kill off bacteria and reduce inflammation.


INGREDIENTS:

  • 1 cup of Himalayan salt (fine)
  • 1/4 cup coconut oil or olive oil
  • 1 tsp castile soap
  • 5-10 drops lavender essential oil
  • (optional) a pinch of mica powder to color the scrub.


(WATCH THE VIDEO DOWN BELOW TO LEARN HOW TO MAKE A LAVENDER FOOT SCRUB.)

DIRECTIONS:


1.) In a bowl, add the Himalayan salt, coconut oil, castile soap, and drops of lavender oil.
2.) Stir to mix all of the ingredients.
3.) (Optional) To add color, add a pinch of purple mica powder.
4.) Transfer to an air-tight container.


HOW TO USE THE SCRUB IN A PEDICURE:


1.) Fill a large bowl with warm water and add a tbsp of the lavender foot scrub. 
2.) Dip your feet in the prepared foot bath and allow them to soak for 10 minutes.
3.) Bring one foot out at a time and place a dap of the scrub onto the feet.
4.) Massage the scrub, focusing on the areas that are cracked to remove the dead skin and calluses.
5.) After a few minutes, rinse the scrub and dry your feet.
6.) Apply a moisturizer, and you're done!


DOES THIS FOOT SCRUB NEED A PRESERVATIVE?

This recipe doesn't contain water so it doesn't require a preservative.  It's important to note that whoever uses it makes sure no water gets into the scrub. As water can contaminate the product, causing bacteria and the growth of mold. It's best to use this foot scrub after the shower or for a pedicure.


    Click To Print    


Share
Tweet
Pin
Share
No comments


Whenever I'm trying to save some money splurging on pedicures isn't always doable, but giving myself one from home is. Especially now that my feet are in desperate need of a fresh new pedicure, I thought it was the perfect occasion to share with you guys how I transformed my feet from fugly to fab! Thankfully it's a lot easier to achieve than you think just follow my ultimate guide on how to give yourself a salon-worthy pedicure from home. 


1.) Sanitizing Your Nail Tools.


Start off by sanitizing your tools with soap and water. Once dried, disinfect them with rubbing alcohol. 


2.) Remove Your Old Nail Polish.


Next, it's time to get rid of your old nail polish. Soak a cotton ball in nail polish remover to get rid of any leftover polish and any excess oil.


3.) Soak Your Feet.


Grab a bucket and fill it with warm water. Add your favorite bath salt and soak your feet for 10-15 minutes to allow your feet to soften. Remove your feet from the water and use a pumice stone to gently remove the calluses from under your feet. 


4.) Trimming Your Nails.


Dry your feet with a towel and gently push back your cuticles. Don't remove them because cuticles protect your nails from bacteria. Then, trim your nails straight across to avoid obtaining ingrown toenails. File the nails in one direction as filing back and forth (sawing motion) will only make your nail bed fragile and cause breakage. Afterward, buff your nails to make them smooth.


5.) Moisturizing Your Feet.


BreakingPic

 Massage your feet with a hydrating lotion of choice to help moisturize your feet. Then apply cuticle oil to each individual toenail. Make sure to massage the oil on your cuticles and the sides of your nails. 


6.) Painting Your Nails.

Sarah Pflug


Grab a cotton ball soaked with rubbing alcohol to remove any oily residue that can cause your nail polish to chip. Use a toe separator (If you have one.) Apply a basecoat, and once dried, apply a thin layer of nail polish (I recommend two coats) letting the polish dry in between coats. Lastly, finish off with a top coat to seal in the polish.


Share
Tweet
Pin
Share
No comments
Older Posts

About me


Hi there! My name is Stefany. I am the writer and creator of Opal Crown. a crafty blog that covers DIY projects, beauty, fashion, decor, lifestyle, sustainability, and much more.

Subscribe For Weekly Updates

* indicates required

Popular Posts

  • DIY Beaded Phone Charm
  • DIY Flaxseed Mask For Hair Growth
  • Thrifted Scalloped Glass Bowl Makeover
  • Fringed Tassel Earrings
  • How to make rice water for hair growth
  • DIY HAIR & SCALP DETOX MASK (+ How to use it)
  • DIY Rose Petal Body Scrub
  • DIY ROPE PLACEMATS WITH FRINGE

Featured Post

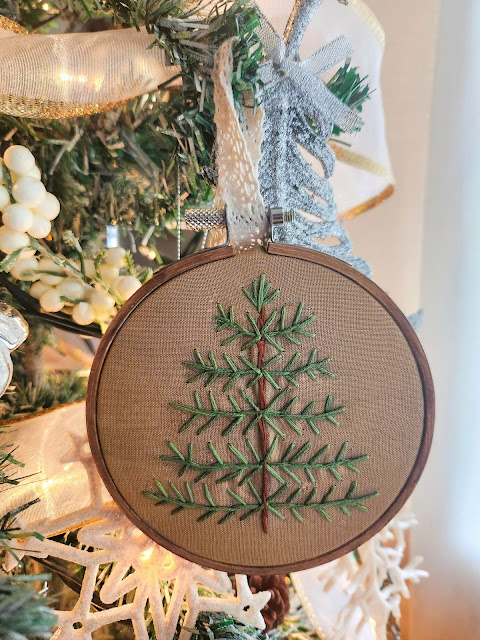
DIY Embroidered Christmas Ornaments

Are you looking for a unique gift idea or new, adorable ornaments to hang on your tree this year?   I have the answer—embroidered ornaments!...

Click To Download

Click To Download
Stay focused and organized throughout the day with a daily planner to help you stay on track with your daily tasks. There are 3 different styles to choose from.

Follow Us

  • instagram
  • pinterest
  • youtube
  • tik tok

Created with by ThemeXpose | Distributed by Blogger Templates