• Home
  • Beauty
    • ALL BEAUTY
    • SKIN CARE
    • HAIR CARE
    • BODY CARE
    • NAIL CARE
    • BEAUTY TIPS
  • FASHION
    • ALL FASHION
    • DIY STYLE
    • DIY ACCESSORIES
  • Eco-friendly
    • ALL ECO
    • ZEROWASTE HOME
    • ZEROWASTE BEAUTY
    • UPCYCLE STLYE
  • Decor
    • ALL DECOR
    • DIY DECOR
    • WALL ART
    • UPCYCLE DECOR
    • CRAFTS
    • DIY FESTIVE
  • SEWING
    • ALL SEW
    • SEW STYLE
    • SEW ECO
    • SEW PROJECTS
  • Holiday
    • ALL FESTIVE
    • DIY CHRISTMAS
    • DIY AUTUMN
    • DIY HALLOWEEN
    • VALENTINE'S DAY
    • GIFTS
  • Dine
  • LIFESTYLE
  • Contact
  • Collaborate
  • Subscribe
  • POLICY
Powered by Blogger.

Opal Crown


I had no idea what to gift my parents for Christmas this year, but I knew one thing for sure, I can never go wrong with alcohol. That's probably the best thing anyone could ever gift them, and I swear, I'm not exaggerating when I say that. To make their gift feel more special, I made a reusable gift bag to place their bottle of wine inside, so let's begin!


MATERIALS NEEDED:

  • Fabric 
  • Needle & Thread/Sewing Machine
  • Pins
  • Scissors


DIRECTIONS:

1.) To begin, you'll need some fabric, any kind will work. I'm using leftover cotton fabric I had in my stash.

2.) Fold the fabric in half, lay the bottle on the fabric, and cut it in a rectangular shape. Cut the rectangle 2 inches wider than the bottle, and 4 inches longer at the top.

3.) Turn the fabric with the right sides together, and stitch the sides.


4.) Fold the top of the fabric over twice and sew.


5.) Flip the fabric over and decorate the bag as you'd wish! I wrote Merry Christmas, tied a ribbon, and some greenery.


Share
Tweet
Pin
Share
1 comments


  • POST UPDATE: April/3/2020 
  • The CDC is now recommending Americans to wear fabric masks to slow the spread of the covid-19 virus.
  • Please keep in mind that standing 6 feet away from people, washing your hands frequently, avoid touching the face, and staying at home is crucial to avoid getting sick.
  • For more information, visit the CDC website.


Surgical face masks have been out of stock for a while now. Ever since the coronavirus (covid-19) became a pandemic, everyone's been stocking up on all sorts of stuff, including surgical facemask. With the coronavirus spreading easily and rapidly, I don't blame people for being scared, as I am too. Unfortunately, many people are hoarding, and because of that, most people don't get the opportunity to buy those items. If you're an elder or if you have any health conditions, that may put you at a higher risk of getting infected by this virus, so using a surgical face mask is ideal. Medical professionals now advise us to wear a facemask especially, if you are sick or if you're taking care of someone with a suspected Covid-19 infection. It's important to note that homemade facemasks aren't as effective as surgical facemasks. However, if you still decide to use a facemask, it's crucial to clean your hands frequently with soap and water for the mask to be effective.  Make an effort to stand within 6 feet away from people and avoid social gatherings to avoid risking getting infected by the virus. With all of that being said, try your best to stay at home unless you really need to go out. Surprisingly making a face mask is really simple, so without further ado, let's get started with the tutorial...


SUPPLIES NEEDED:
  • Main Fabric  (cotton material) (prewashed)
  • Inner Fabric (cotton material) (prewashed)
  • Needle & Thread
  • Scissors
  • Elastic Band
  • Pins
  • Paper & Pen
QUICK DISCLAIMER: I make no claims that these masks will protect you against covid-19. Use it at your own risk.


INSTRUCTIONS:


1.) Start by drawing the template down below. Keep in mind that everyone is different, so adjust the measurements if needed.


2.) Cut out the pattern, fold the fabric in half (with the wrong sides facing each other,) and pin in place.


3.) Cut the fabric, leaving a 1/2inch seam allowance.


4.) Repeat the same steps for the inner fabric. You should end up with 4 patterns in total.


5.) Pin the curved edges of the fabric, with the wrong sides facing each other, and sew.


6.) Do the same for the inner fabric.


7.) Carefully, clip along the edge.


8.) Pin both of the fabrics, with the right sides facing each other.


9.) Sew the top and the bottom together.


10.) Flip the mask inside out.


11.) To create the pocket of the elastic strings, fold in the side, and sew straight down. Do the same for the other side.


12.) Cut two elastic strings (10 inches) and insert them through the pockets of the masks. Stitch the ends, or tie a knot, to secure in place.


You are all done!


REMINDER:
  • It's important to always wash your mask after every use.
  • Avoid removing the mask from the front of the face. 
  • Instead, remove the mask from the ears.
 Thank you all, and stay safe...

RELATED POSTS:

  • DIY Hand Sanitizer
  • Fabric Facemask

Share
Tweet
Pin
Share
No comments

Something I've wanted for quite some time now is a travel utensil holder. I don't go out much, but when I do, I'm out for most of the day.  I always carry with me a reusable water bottle, but for some darn reason, I always forget to pack my utensils! It happens more often than I would like to admit, and of course, I always feel guilty about it. That's why I finally decided to make my own cutlery wrap. I couldn't wait to share with you guys how I made it without using a sewing machine (of course, to save yourself some time, you should definitely use one.) But if you're like me and still don't know how to properly use a sewing machine, then this tutorial is just for you! It was really simple to make, so let's get started, shall we?


SUPPLIES NEEDED:


  • The fabric of choice ( I used two patterns)
  • Needle & Thread
  • Pins
  • Scissors 
  • Ruler
  • Chalk
  • Ribbon/String
INSTRUCTIONS:

1.) Start by cutting the fabrics into two rectangular shapes (approximately 10 inches x 14 inches.) Make sure to cut the fabric taller than the tallest utensil. 

Use two different kinds of patterns if you want the outside of your wrap to be different.


2.) Then pin the fabrics together with the right sides facing each other.


3.) Stitch 3 sides of the fabric together, make sure to leave a half-inch seam allowance between the edge.

 Leave one side of the cutlery wrap open.


4.) When you are done sewing, turn the fabric inside out. Fold the edges of the opening in, and sew in place.


5.) To create the pocket, measure a piece of fabric ( 6inches x 10 inches.) 


6.) Fold the edges over and hem the top side only.


7.) Pin the pocket to the cutlery wrap. Then, sew the sides and the bottom of the fabrics together.


8.) Use a ruler and chalk to mark even lines on the pocket.


9.) Then, stitch straight down the lines to create individual pockets.


10.) Finally, wrap it using a piece of lace or string.

Did you enjoy today's post? Let me know in the comments down below what other things you would like me to DIY next? See you next time, guys!


Share
Tweet
Pin
Share
No comments
Older Posts

About me


Hi there! My name is Stefany. I am the writer and creator of Opal Crown. a crafty blog that covers DIY projects, beauty, fashion, decor, lifestyle, sustainability, and much more.

Subscribe For Weekly Updates

* indicates required

Popular Posts

  • DIY Beaded Phone Charm
  • DIY Flaxseed Mask For Hair Growth
  • DIY ROPE PLACEMATS WITH FRINGE
  • DIY HAIR & SCALP DETOX MASK (+ How to use it)
  • Thrifted Scalloped Glass Bowl Makeover
  • DIY Aloe Vera Mask For Glowing Skin
  • Fringed Tassel Earrings
  • Playhouse Makeover

Featured Post

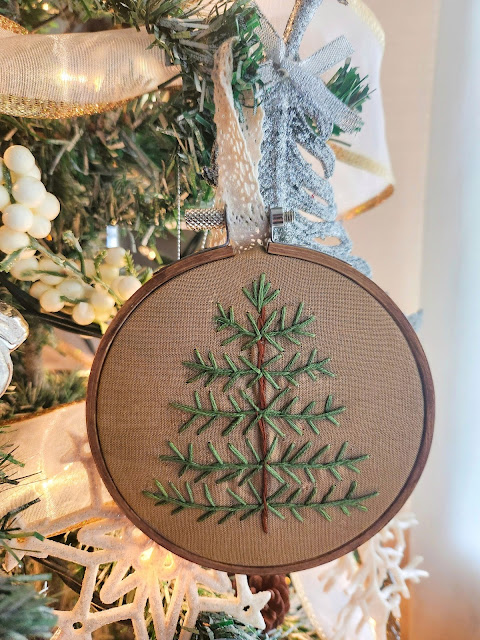
DIY Embroidered Christmas Ornaments

Are you looking for a unique gift idea or new, adorable ornaments to hang on your tree this year?   I have the answer—embroidered ornaments!...

Click To Download

Click To Download
Stay focused and organized throughout the day with a daily planner to help you stay on track with your daily tasks. There are 3 different styles to choose from.

Follow Us

  • instagram
  • pinterest
  • youtube
  • tik tok

Created with by ThemeXpose | Distributed by Blogger Templates