• Home
  • Beauty
    • ALL BEAUTY
    • SKIN CARE
    • HAIR CARE
    • BODY CARE
    • NAIL CARE
    • BEAUTY TIPS
  • FASHION
    • ALL FASHION
    • DIY STYLE
    • DIY ACCESSORIES
  • Eco-friendly
    • ALL ECO
    • ZEROWASTE HOME
    • ZEROWASTE BEAUTY
    • UPCYCLE STLYE
  • Decor
    • ALL DECOR
    • DIY DECOR
    • WALL ART
    • UPCYCLE DECOR
    • CRAFTS
    • DIY FESTIVE
  • SEWING
    • ALL SEW
    • SEW STYLE
    • SEW ECO
    • SEW PROJECTS
  • Holiday
    • ALL FESTIVE
    • DIY CHRISTMAS
    • DIY AUTUMN
    • DIY HALLOWEEN
    • VALENTINE'S DAY
    • GIFTS
  • Dine
  • LIFESTYLE
  • Contact
  • Collaborate
  • Subscribe
  • POLICY
Powered by Blogger.

Opal Crown


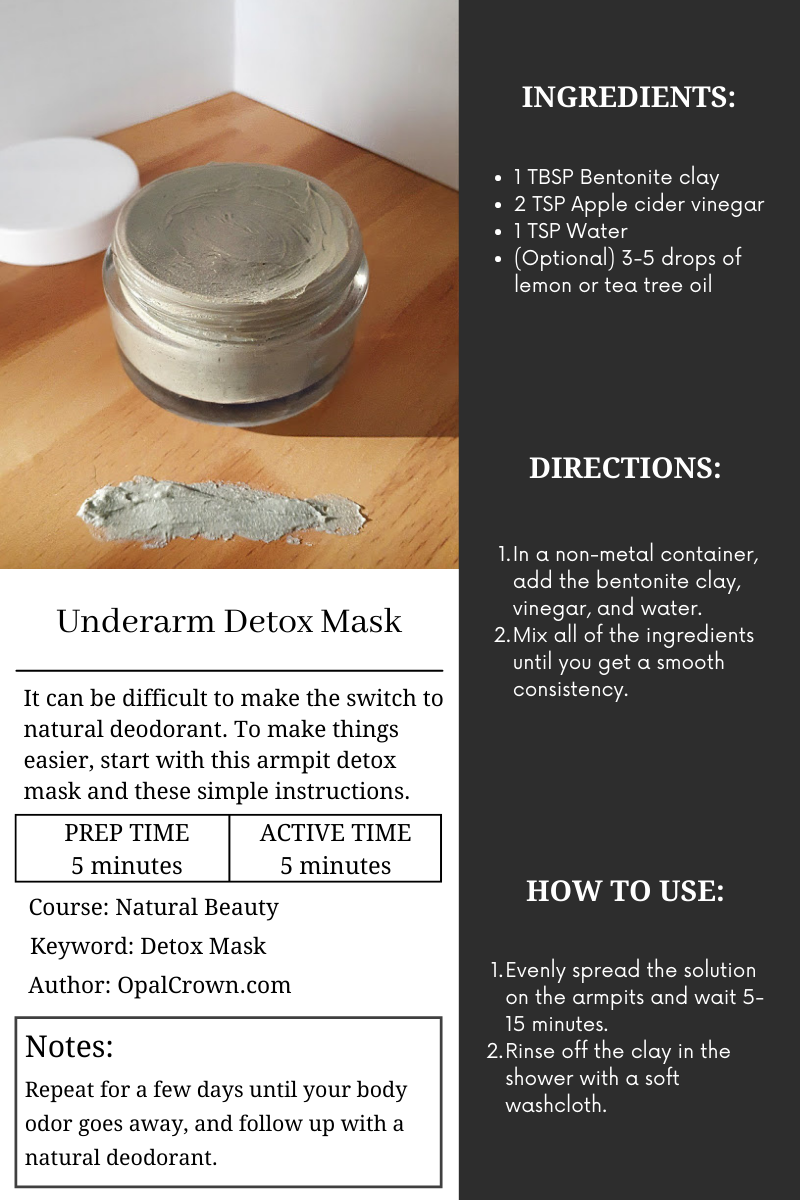
The first time I used bentonite clay was to make a detox facial mask, which I still love and use until this day. If you haven't tried it yet, I encourage you to give it a try, I promise you won't be disappointed. For the longest time, I've been wanting to use bentonite clay to make an underarm detox mask. Using a detox paste on the underarms has several benefits, as it helps the body release toxins and decreases the amount of sweat your body produces. Conventional deodorants and antiperspirants contain several chemicals and additives that do more harm than good.


Some might included...

  •  Parabens
  •  Aluminum
  •  Phthalates
  •  Propylene glycol 


Switching to natural deodorants, whether purchased or homemade, is something I recommend. Using this detox treatment when switching will make the transition easier. When I first made the switch to natural deodorants, my armpits emitted an unpleasant odor because my pores were no longer clogged. However, it's all part of the process, and it's quite natural.


To make this underarm cleanse, you only need 3 simple ingredients.

  • 1 TBSP Bentonite clay
  • 2 TSP Apple cider vinegar
  • 1 TSP Water 
  • (Optional) 3-5 drops of lemon or tea tree oil


DIRECTIONS:
  1. In a non-metal container, add the bentonite clay, vinegar, and water.
  2. Mix all of the ingredients until you get a smooth consistency.
  3. Evenly spread the solution on the armpits and wait 5-15 minutes.
  4. Rinse off the clay in the shower with a soft washcloth.
NOTE: Repeat for a few days until your body odor goes away, and follow up with a natural deodorant.


    Click To Print    


Share
Tweet
Pin
Share
No comments
Karolina Grabowska


Aside from the kitchen, bathrooms can produce a lot of waste, from plastic packaging to disposable products that are filled with unsafe ingredients that aren't healthy for you or the environment. However, replacing your everyday bathroom essentials with eco-friendly alternatives is possible and a lot easier than you think. Today I wanted to focus on sustainable products that will help you create less waste and save you money in the long run...


1.) ORGANIC COTTON TOWELS.


100% organic cotton towels are biodegradable and can be composted. However, this isn't the case for cotton towels that are partially made of other synthetic materials like polyester that can take more than 20-200 years to break down. Organic cotton towels aren't made with chemicals like toxic pesticides or fertilizers that harm the environment. Therefore, organic cotton towels are ideal as they're safer for you and the planet.


2.) BODY SOAP. 


Instead of using shower gels that come in plastic bottles, replace them with a bar of soap that comes unpackage or in sustainable packaging. However, if you don't want to switch over to bars, try purchasing shower gels in a larger size and recycle the bottle afterward or opt for a refillable dispenser. 


3.)  COTTON SWABS / Q-TIPS.


Most cotton swabs are made of plastic, which is harmful to the planet because many of these end up in the oceans or in landfills. Instead, switch to paper cotton swabs that are biodegradable or choose a reusable one that's durable, easy to clean, and more eco-friendly.


4.) MENSTRUAL CUP.


There are several different options for a more sustainable period. From menstrual cups to cloth pads, and period panties, they're all a better alternative to single-use cotton pads and tampons. Investing in reusable menstrual products can save you money in the long run and last you years.


5.) SAFETY RAZORS.

Laura Mitulla
Recycling plastic razors is a bit of a challenge because they're made of several materials that make them difficult to recycle. Instead of using disposable plastic razors, opt for a durable metal or bamboo safety razor. They can last a lifetime if properly taken care of, all you have to do is switch out the blades, and recycle the old ones.


6.) BAMBOO TOOTHBRUSH.


One of the very first zero-waste swaps I did in my bathroom was replacing my plastic toothbrush with a biodegradable bamboo toothbrush. Plastic toothbrushes are very wasteful, they are made from polypropylene plastic and nylon that take up to 400 years to decompose. Switch your regular toothbrush for a sustainable alternative that's better for the environment.


Share
Tweet
Pin
Share
No comments
  When it comes to my home, I try my best to stick to natural products, especially when it comes to cleaning. My son loves helping me clean around the house, so for that exact reason, I like using products that are natural and free of toxic chemicals. Besides, I don't mind making my own cleaning supplies, they're safer to use, I don't have to worry about my son inhaling harmful ingredients, and it's better for the planet. All of the supplies needed to make this homemade all-purpose cleaner are simple, you might already own it in your pantry, so with that being said, let's jump right in...


WHY LEMON AND TEA TREE OIL?

LEMON ESSENTIAL OIL: The reason I love using citrus essential oils like lemon is because of its refreshing scent. Not only does it smell amazing, but it's also great for disinfecting and getting rid of tough spots in your kitchen.

TEA TREE OIL: Tea tree oil is one of my favorite essential oils to clean with, because of its natural antibacterial and antifungal properties.


MATERIAL NEEDED:

  • 1 cup of distilled water
  • 1 cup of vinegar
  • 10 drops of lemon oil
  • 10 drops of tea tree oil


TOOLS NEEDED:
  • Funnel
  • Glass spray bottle


DIRECTIONS:

1.) In a glass bottle, pour the water and the vinegar.

2.) Add the drops of essential oil and shake the bottle well to combine.

*Shake well before using it.*
Share
Tweet
Pin
Share
No comments

Something I've wanted for quite some time now is a travel utensil holder. I don't go out much, but when I do, I'm out for most of the day.  I always carry with me a reusable water bottle, but for some darn reason, I always forget to pack my utensils! It happens more often than I would like to admit, and of course, I always feel guilty about it. That's why I finally decided to make my own cutlery wrap. I couldn't wait to share with you guys how I made it without using a sewing machine (of course, to save yourself some time, you should definitely use one.) But if you're like me and still don't know how to properly use a sewing machine, then this tutorial is just for you! It was really simple to make, so let's get started, shall we?


SUPPLIES NEEDED:


  • The fabric of choice ( I used two patterns)
  • Needle & Thread
  • Pins
  • Scissors 
  • Ruler
  • Chalk
  • Ribbon/String
INSTRUCTIONS:

1.) Start by cutting the fabrics into two rectangular shapes (approximately 10 inches x 14 inches.) Make sure to cut the fabric taller than the tallest utensil. 

Use two different kinds of patterns if you want the outside of your wrap to be different.


2.) Then pin the fabrics together with the right sides facing each other.


3.) Stitch 3 sides of the fabric together, make sure to leave a half-inch seam allowance between the edge.

 Leave one side of the cutlery wrap open.


4.) When you are done sewing, turn the fabric inside out. Fold the edges of the opening in, and sew in place.


5.) To create the pocket, measure a piece of fabric ( 6inches x 10 inches.) 


6.) Fold the edges over and hem the top side only.


7.) Pin the pocket to the cutlery wrap. Then, sew the sides and the bottom of the fabrics together.


8.) Use a ruler and chalk to mark even lines on the pocket.


9.) Then, stitch straight down the lines to create individual pockets.


10.) Finally, wrap it using a piece of lace or string.

Did you enjoy today's post? Let me know in the comments down below what other things you would like me to DIY next? See you next time, guys!


Share
Tweet
Pin
Share
No comments

 HOW TO UPCYCLE OLD GLASS JARS INTO KITCHEN CANISTERS

Why waste money on brand new mason jars to store your food. When you can repurpose your emptied glass jars of marinara sauce. They work just as good, are basically free, and look pretty darn cute. I personally love using these glass jars to fill them with spices, seeds, nuts, and many more things I purchase in bulk. They're also perfect to store leftover food, fresh herbs, and homemade salsa. If you want to learn how to repurpose your empty glass jars, then keep on scrolling. 


1.) Removing Labels.


Removing the labels from these jars is pretty easy to do but the leftover residue glue, on the other hand, isn't. Luckily I just found out how to remove it. All you need is 3 simple ingredients. Grab a bucket or large pot and fill it with enough hot water to submerge your glass jars. Add a cup of vinegar and a few squirts of dish soap. Place your jars inside the pot for at least 15-30 minutes. The longer you wait the easier the glue will dissolve. Afterward, peel the rest of the label off and scrub any leftover residue with a rough sponge or brush.


2.) Adding Labels. 

Next, add labels to the glass jars. I purchased mine at my local dollar tree a few months ago, but if you can't get your hands on chalkboard labels. You can use chalk paint to make your labels instead. You also have the option of writing directly onto the jars with an oil-based marker.


3.) Painting The Lids.

Next, paint your lids using acrylic paint and a brush.


4.) Once the jar lids are dry, you can fill them with whatever you'd like, and you are all finished!


I hope you guys enjoyed today's post, and if you did please don't forget to subscribe for more content just like this one. 

RELATED POSTS:
  • Simple Eco-Friendly Kitchen Alternatives
  • How To Make Produce Bags
  • How To Store Produce Without Plastic
  • DIY Cutlery Wrap
  • Natural All-Purpose Cleaner


Share
Tweet
Pin
Share
No comments

Artiom Vallet 

A year ago, I made the decision of reducing the amount of plastic I use around my home. Eliminating the use of plastic bags was my first attempt in reducing less waste in my life. Not only are plastic bags bad for the environment, but they also contain several harmful chemicals that like to stick around in our food. Ditch the plastic bags, plastic containers, and pick a more eco-friendly alternative. 


1.) Storing Vegetables

Kristen Kaethler 

  • Avocado: Store at room temperature in a paper bag (refrigerate when ripe)
  • Broccoli: Place the broccoli in an open container, or you can wrap it in a damped towel.  Make sure to store it in the refrigerator.
  • Cucumbers: Wrap the cucumbers in a damp towel and place inside the refrigerator.
  • Carrots/ Herbs/ Spring Onions: Fill a glass with water and place vegetables/ herbs inside glass to help keep them fresh and afterward store in the fridge.
  • Garlic/ Onions/ Potatoes: Store in a dark, dry, and cool place to avoid greening. (Avoid refrigerating.)
  • Leafy Greens: Wash and wrap your leafy greens in a damped towel without wrapping to tight to allow it to breathe and help keep it fresh.
  • Lemons and Limes:  Store at room temperature and avoid storing in the fridge.
  • Mushrooms: Store in a paper bag inside the fridge
  • Radishes: Wash and place in a jar filled with water ( store in fridge )
  • Tomatoes:  Store at room temperature and avoid refrigerating.


2.) Storing Fruits.


  • Apples/ Apricots/ Pears:  Avoid storing in the fridge (except when ripe) and instead place over the counter in a cool place.
  • Bananas/ Oranges: Leave over the counter and avoid refrigerating.
  • Blueberries/ Cherries/ Raspberries/ Strawberries:  Don't wash until you're ready to eat. Washing it too soon will only mold. Store in paper bags or a glass container. 


 3.) How to Store Cut Produce/Leftovers/ Etc.


A great way of storing cut produce is by using wax wraps. Whenever I don't finish half of an avocado or other veggies/fruit, I wrap it with wax paper to keep it fresh. Wax wraps are also a great way of storing bread and cheese.  It's a better alternative than using plastic wraps.


cottonbro

 Glass Jars are also a great way of storing your seeds, nuts, rice, beans, and everything else you buy in bulk that can be left inside your kitchen pantry.
Store your leftovers with glass or stainless steel containers. Plastic containers aren't environmentally friendly and contain harmful chemicals that leach on our food. If your only option is to purchase plastic storage containers, opt for a BPA free alternative. Though I recommend visiting your local thrift store first. You'll find a selection of mason jars that are budget-friendly, and you'll be upcycling, which overall is way better for our planet.


That's it, really easy ways of storing your food without plastic. You help reduce less waste and avoid contaminating your produce with toxic chemicals that plastic contain! It's a win-win.


RELATED POSTS:

  • How To Reuse Glass Jars
  • How To Make Produce Bags
  • Simple Eco Friendly Kitchen Alternatives
  • DIY Cutlery Wrap
  • Natural All-Purpose Cleaner


Share
Tweet
Pin
Share
No comments
Older Posts

About me


Hi there! My name is Stefany. I am the writer and creator of Opal Crown. a crafty blog that covers DIY projects, beauty, fashion, decor, lifestyle, sustainability, and much more.

Subscribe For Weekly Updates

* indicates required

Popular Posts

  • DIY Beaded Phone Charm
  • DIY Flaxseed Mask For Hair Growth
  • DIY ROPE PLACEMATS WITH FRINGE
  • DIY HAIR & SCALP DETOX MASK (+ How to use it)
  • Thrifted Scalloped Glass Bowl Makeover
  • DIY Aloe Vera Mask For Glowing Skin
  • Fringed Tassel Earrings
  • Playhouse Makeover

Featured Post

DIY Embroidered Christmas Ornaments

Are you looking for a unique gift idea or new, adorable ornaments to hang on your tree this year?   I have the answer—embroidered ornaments!...

Click To Download

Click To Download
Stay focused and organized throughout the day with a daily planner to help you stay on track with your daily tasks. There are 3 different styles to choose from.

Follow Us

  • instagram
  • pinterest
  • youtube
  • tik tok

Created with by ThemeXpose | Distributed by Blogger Templates