• Home
  • Beauty
    • ALL BEAUTY
    • SKIN CARE
    • HAIR CARE
    • BODY CARE
    • NAIL CARE
    • BEAUTY TIPS
  • FASHION
    • ALL FASHION
    • DIY STYLE
    • DIY ACCESSORIES
  • Eco-friendly
    • ALL ECO
    • ZEROWASTE HOME
    • ZEROWASTE BEAUTY
    • UPCYCLE STLYE
  • Decor
    • ALL DECOR
    • DIY DECOR
    • WALL ART
    • UPCYCLE DECOR
    • CRAFTS
    • DIY FESTIVE
  • SEWING
    • ALL SEW
    • SEW STYLE
    • SEW ECO
    • SEW PROJECTS
  • Holiday
    • ALL FESTIVE
    • DIY CHRISTMAS
    • DIY AUTUMN
    • DIY HALLOWEEN
    • VALENTINE'S DAY
    • GIFTS
  • Dine
  • LIFESTYLE
  • Contact
  • Collaborate
  • Subscribe
  • POLICY
Powered by Blogger.

Opal Crown


A sustainable alternative to gift wrapping is furoshiki. Which is a traditional Japanese wrapping cloth used to wrap gifts or carry belongings. The type of fabric that is most commonly used is cotton, silk, nylon, or rayon. I love using fabric instead of single-use gift wraps to reduce waste. Cloth wrapping doesn't only look gorgeous, but it can last a very long time. You can use various pattern designs or colors depending on who you are planning on gifting it to. I wanted to make the fabric wrap using materials I already had at home. I found these beautiful fabric scraps I've used in previous projects. They were perfect and came out better than I expected.


MATERIALS:

  • Fabric 
  • Scissors
  • Needle & thread or sewing machine
  • Optional: greenery or flowers


DIRECTIONS:

1.) Cut the fabric to your desired size or depending on the size of your gift. (Mine measures 60 by 60 cm.)


2.) With the right side facing down, fold and press half an inch from the edge. 


3.) Fold and press the edge again. (Do this to each side.)


4.) Pin the edges so they won't unfold.


5.) Sew using a straight stitch by hand or with a sewing machine. 


6.) Do this to each side, and you are done!


7.) Decorate the gift with greenery or dried flowers.


Share
Tweet
Pin
Share
5 comments


 I can't believe 2020 is almost over. It was a heck of a year for everyone. No matter what happened, I couldn't be happier that it was finally coming to an end. With Christmas right around the corner, I was really excited to start shopping for everyone. Especially for my son, now that he's older, looking for things he likes was so much fun. Since I have a lot of wrapping to do, I thought I would share with you guys my fav tips and tricks for wrapping gifts using items from the dollar tree. You'd be surprised by how many amazing things you can find there. One of my favorite finds was the chalkboard tags because I can reuse them every year and the baker twine. 

Disclosure: This post may contain affiliate links, which means that if you decide to make a purchase through my links, I will receive a commission at no additional cost to you. For additional information, please see my disclosure.


MATERIAL NEEDED:

  • White Kraft Paper
  • Brown Kraft Paper
  • Kraft Gift Box
  • Burlap Ribbon
  • Lace Ribbon
  • Jute Twine
  • Baker Twine
  • Chalkboard Tags/ Marker 
  • Black & White Paint/ Paintbrushes
  • Greenery


DIRECTIONS:

1ST GIFT IDEA:

1.) This gift idea is the easiest of them all. Start by wrapping a lace ribbon around the kraft box, and tie a simple bow.


2.) Add a tag to the box and some greenery.


2ND GIFT IDEA:

1.) Wrap the gift like you usually would with brown kraft paper.

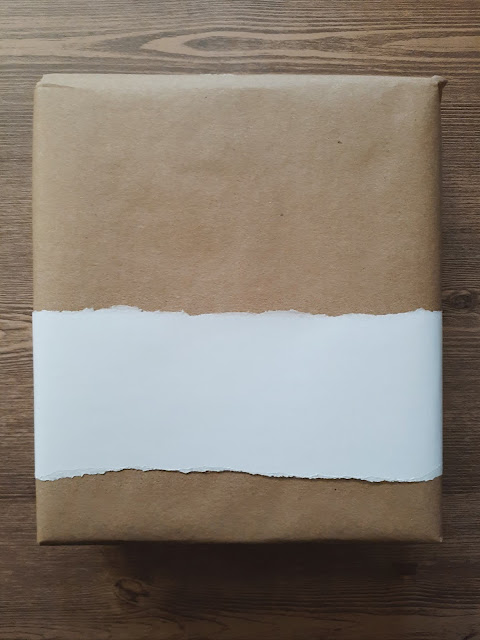
2.) Rip a piece of white kraft paper.

3.) Wrap the stripe around the gift, and secure the ends with tape.


4.) Wrap the box with burlap ribbon and secure the ends with tape.


5.) Next, take some twine and wrap it around the box. Then, tie the ends into a bow.


6.) To finish, top off the present with some greenery and a tag.


3RD GIFT IDEA:

1.) Wrap the present with brown kraft paper.

2.) In a container, add 1 part of the black acrylic paint and another part of the water. Mix well to combine the mixture. Do the same with the white paint.

3.) Dip the brush in the paint and flick the brush onto the paper.


4.) Continue flicking the brush onto the paper until you are satisfied with the results.


5.) Once the paint dries, wrap baker twine around the gift several times, add the greenery and the chalkboard tag.


Share
Tweet
Pin
Share
No comments
Older Posts

About me


Hi there! My name is Stefany. I am the writer and creator of Opal Crown. a crafty blog that covers DIY projects, beauty, fashion, decor, lifestyle, sustainability, and much more.

Subscribe For Weekly Updates

* indicates required

Popular Posts

  • DIY Flaxseed Mask For Hair Growth
  • DIY Aloe Vera Mask For Glowing Skin
  • Brightening Turmeric & Aloe Gel Mask
  • Fringed Tassel Earrings
  • DIY HAIR & SCALP DETOX MASK (+ How to use it)
  • DIY Beaded Phone Charm
  • How to make rice water for hair growth
  • DIY Rose Petal Body Scrub

Featured Post

DIY Embroidered Christmas Ornaments

Are you looking for a unique gift idea or new, adorable ornaments to hang on your tree this year?   I have the answer—embroidered ornaments!...

Click To Download

Click To Download
Stay focused and organized throughout the day with a daily planner to help you stay on track with your daily tasks. There are 3 different styles to choose from.

Follow Us

  • instagram
  • pinterest
  • youtube
  • tik tok

Created with by ThemeXpose | Distributed by Blogger Templates