• Home
  • Beauty
    • ALL BEAUTY
    • SKIN CARE
    • HAIR CARE
    • BODY CARE
    • NAIL CARE
    • BEAUTY TIPS
  • FASHION
    • ALL FASHION
    • DIY STYLE
    • DIY ACCESSORIES
  • Eco-friendly
    • ALL ECO
    • ZEROWASTE HOME
    • ZEROWASTE BEAUTY
    • UPCYCLE STLYE
  • Decor
    • ALL DECOR
    • DIY DECOR
    • WALL ART
    • UPCYCLE DECOR
    • CRAFTS
    • DIY FESTIVE
  • SEWING
    • ALL SEW
    • SEW STYLE
    • SEW ECO
    • SEW PROJECTS
  • Holiday
    • ALL FESTIVE
    • DIY CHRISTMAS
    • DIY AUTUMN
    • DIY HALLOWEEN
    • VALENTINE'S DAY
    • GIFTS
  • Dine
  • LIFESTYLE
  • Contact
  • Collaborate
  • Subscribe
  • POLICY
Powered by Blogger.

Opal Crown


I've always assumed I had straight hair. Until I watched videos on the internet of women with my hair type trying the curly girl method. I was shocked to see these women's hair transform from frizzy "straight hair" to gorgeous wavy/curly hair. I was intrigued and curious to find out if my hair was actually wavy. I used to wonder why my hair was never pinned straight and why some strands were on the wavier side.  I noticed a difference in the texture of my hair after I stopped using heat tools, products with harsh ingredients, and when I cut off the dead ends. When I finally tried the curly girl method, I discovered that my hair was wavy. The more I did it, the wavy my hair became. This experience taught me how to properly care for my hair and how to embrace my 2a/2b waves.


LEARNING ABOUT HAIR PATTERNS:

Back when I had no idea my hair was wavy. My haircare routine after the shower was straightforward. I'd let my hair air dry before brushing it and would apply a small amount of oil to the ends (that was it!)  I'd always noticed that I had a slight wave in my hair, almost like an "s" shape. I discovered my curl pattern after watching Brad Mondo. (His video was very informative, especially if you don't know what your hair pattern is.) He discusses four separate topics. The first of which is scalp type. Which can be normal, oily, or dry. Hair thickness and density fall into the second category. People (including myself) frequently confuse the differences between these two topics, so he explains them in greater detail in his video. He'll help determine whether your hair is thick or thin. If it's damaged or if it's healthy. The final topic he discusses is hair patterns. Type 1 is a rare hair type that is naturally straight with no curl pattern. If your hair isn't pinned straight, it's because it's wavy or curly. Wavy, curly, and coiled hair are the three subcategories. Once you've determined your hair type, you'll have a thorough understanding of what products your hair requires.


HOW I TRANSITIONED:

As stated earlier, I stopped using heat on my hair to reduce damage, switched to natural products, and got rid of the split ends. I purchased hair care products specifically designed for wavy/curly hair. Along with styling moose/gel. Once a week, I use hair treatments to strengthen and repair my hair. A few times a month, I rinse my hair with rice water, which has improved the overall texture of my hair. In addition, I use a regrowth serum ( I highly recommend incorporating both into your hair care routine.) I scrunch and plop my hair after the shower. After that, I'll wrap a silk scarf around my hair before going to bed.


THEN V.S NOW:


My hair used to be damaged, dry, dull, and frizzy. I had no idea what products to use or how to tame it. I didn't even have a proper hair care routine. My hair is now thicker, healthier, softer, and more manageable. My hair looks wavier the more I embrace my natural hair texture. My routine isn't perfect. In fact, I still have difficulty styling my hair, but at least I now know how to care for it.

DON'T GIVE UP:

Never in a million years did I imagine my hair to be wavy. I've only been using the curly girl method for a month, and I've already noticed a significant improvement in my hair's appearance and texture. Transitioning to wavy hair is difficult as it requires a lot of maintenance, but believe me when I say it gets easier once you get the hang of it. If you think you have wavy/curly hair and want to find out, I recommend the curly girl method. Walmart and Target sell affordable hair products for curly hair under 20 dollars. Give it a shot, and share your results in the comments section below.


Share
Tweet
Pin
Share
No comments

Dealing with dark underarms could make you feel self-conscious, especially when they are in full display. One of the reasons I disliked wearing tank tops during the summer was my dark underarms. They were never super dark, but dark enough to make me feel insecure. If you are experiencing this problem, I have great news for you. Lightening your armpits is totally possible and easy to achieve using natural ingredients.


TURMERIC: Turmeric has antioxidants and anti-inflammatory properties that help reduce dark spots and evens out the skin tone.

HONEY: Honey is antibacterial, contains antioxidants, minimizes inflammation, moisturizes, and brightens the skin.

LEMON: Lemon contains a high amount of vitamin C, which helps lighten the skin naturally and removes dead skin cells.


INGREDIENTS:

  • 1 tbsp baking soda
  • 1 tsp turmeric powder
  • 1 tsp honey
  • 1/2 lemon
  • enough water to make a paste consistency


DIRECTION:

1.) In a small bowl, add the baking soda and turmeric powder.

2.) Add the honey, lemon, and water.

3.) Mix well to combine all of the ingredients until you obtain a paste consistency.


HOW TO USE:

1.) Apply the mixture to the underarms. 

2.) Leave it for about 5-10 minutes and wash it off.

* Recommend using 3-4 times a week*

*Do not apply on recently shaved underarms as it may cause irritation.*

Share
Tweet
Pin
Share
No comments

A year ago, I published a post discussing cellulite and 6 natural ways to minimize it. (If you haven't read it, I'll leave a link to that post here.) On one of the topics, I mentioned that coffee can help reduce the appearance of cellulite. I recommended making a coffee body scrub for a reason. This recipe is effective, natural, and only has three main ingredients.


COFFEE: The caffeine in coffee can help treat cellulite and lessen its appearance. Massaging coffee grounds on the affected area can improve blood flow, circulation, tighten and plump the skin. 

COCONUT OIL: Coconut oil contains collagen-boosting properties that can naturally improve the look of cellulite. It could help nourish, firm, tighten, and smooth the skin.

BROWN SUGAR: Brown sugar is a natural ingredient used in many homemade body scrubs to exfoliate. It's gentle on the skin, removes dead skin cells, moisturizes, and softens the skin.


 INGREDIENTS:

  • 3 tbsp ground coffee 
  • 5 tbsp of brown sugar
  • 3 tbsp of fractionated coconut oil or olive oil
  • 1/4 tsp vanilla extract 


DIRECTIONS:

1.) In a glass bowl, add the ground coffee, brown sugar, coconut oil, and vanilla extract. 
2.) Mix everything well to combine all of the ingredients.


HOW TO USE:

1.) Massage the mixture in the trouble area for 2-5 minutes. 
2.) Once you are done, rinse the area with water and pat dry.


NOTE:
  • Store the leftover scrub in an air-tight container.
  • Repeat this procedure 2-3 times a week.

    Click To Print    


Share
Tweet
Pin
Share
No comments
Lauren Fleischmann

For years and years now, I've been dying my own hair at home. Not only do I save money by doing so, but I also enjoy the process. I love that I can give myself a fresh new look without having to leave the comfort of my own home. However, dying your hair from home can be a bit tricky, that's why I decided to share with you ladies some of my favorite tips and tricks to make dying your hair, less intimidating and a lot easier, so let's get started...


MATERIALS NEEDED:

  • Hair dye kit
  • Comb
  • Petroleum jelly
  • Hair clips
  • Gloves
  • Old T-shirt
  • Deep conditioner for your hair type


TIPS:


1.) PICK THE RIGHT SHADE.


Before you buy any hair dye, make sure to pick the right shade for your skin tone. One way of telling what your undertone is by looking at the veins on your wrist. There are 3 different kinds of undertones cool, warm, and neutral.


  • For example, if the color of your veins is bluish-purple, then you are cool-toned.
  • If they are green, then you are a warm tone.
  • If they are bluish-green, then you are neutral. This basically means you can rock both.


2.) BUY TWO BOXES.

Now that you have determined what shade to buy, make sure to purchase two boxes for your hair. Trust me, I've made the mistake of buying one box in the past and ran out halfway through the process. 


3.) STRAND TEST.

Taking the time to do a quick strand test before you decided to dye your hair is important, especially when you are using a new shade to determine the outcome of the color. To do this, take a small section of hidden hair, and apply the hair dye.


4.) PREP THE HAIR.

Before you begin to dye your hair, make sure to work with dirty hair. Dying your hair when it's dirty allows the natural oils in your hair to protect the scalp from getting irritated by harsh chemicals.


5.) PROTECT YOUR HAIRLINE.

One of the worst things about not protecting your skin from the hair dye is the leftover stain it leaves behind. Fortunately, it's easy to avoid. Just apply vaseline or lip balm on the hairline, neck, and ears.


6.) PREPARING THE DYE.

Cottonbro


Every box dye comes with different instructions on how to prepare the hair dye. Usually, the directions are easy to follow. Just mix all of the ingredients in the bottle provided or in a bowl.


7.) CHANGE YOUR OUTFIT.

The last thing you want is to ruin your favorite top by staining it with hair dye. Change into clothes you don't really care about and put on a pair of gloves to avoid staining your hands with dye.


8.) PREP YOUR STATION.

Hair dye can stain anything, from wood, plastic, walls, etc... Make sure to cover the areas where you'll be dying your hair.


DIRECTIONS ON DYING THE HAIR:


1.) SECTION YOUR HAIR.


Use large hair clips to section the hair in 4 equal sections to apply the hair dye evening.


2.) START AT THE TOP.

Cottonbro

Start by applying the dye directly to the roots since they need the most time to develop. Then, brush the hair dye down through the rest of your hair until the ends of your hair are fully covered.

Clip the hair back up and continue to do this until you are done with all 4 sections.


3.) WAITING.

Sarah Pflug

Now it's time to wait, you can set a timer to remind you when it's time to wash off the
Share
Tweet
Pin
Share
No comments
Godisable Jacob

Let's clear something up, cellulite is a natural thing. More than 80 percent of women have it regardless of what size they are, so we shouldn't be ashamed of it. However, there's nothing wrong with wanting to get rid of it. Personally for me ever since I can remember, I've always had cellulite on the back of my thighs, and now that I'm older, it got worse. To the point where it started to bother me, so I knew I needed to do something about it. After trying out numerous different methods and changing my diet. I finally minimized the appearance of my cellulite, and today, I wanted to share with you ladies how I did it.


WHAT IS CELLULITE?

Before I start talking about how to minimize your cellulite, let's talk about what it is. Cellulite is a skin condition that occurs when fat deposits beneath the skin. Cellulite is dimpled-looking skin that typically appears in the butt, thighs, and hip region. The exact cause of cellulite is unknown, but women are more likely to develop cellulite than men due to the difference in fat cells, muscle, and connective tissue. Regardless of your age or weight, anyone can have cellulite.


HOW TO GET RID OF CELLULITE.

1.) EXERCISING.

Shopify partners

One of the most effective ways (I've found) to fight against cellulite is by exercising to burn unwanted fat. Toning your body and strengthening your muscles will help to minimize the appearance of cellulite. Some exercises you might want to try are squats, lunges, leg lifts, or any kind of cardio to burn fight. Weight lifting is another great option that I recommend you incorporate into your exercising routine.


2.) STAYING HYDRATED.


Another natural and extremely inexpensive way of getting rid of cellulite is by drinking lots of liquid. Dehydration can cause thinner and weaker skin, thus making cellulite more visible. Make sure to consume at least 8-10 cups of water daily to stay hydrated and flush out any toxins from your body.


3.) CHANGE YOUR DIET.

Amoon Ra

Avoid foods that contain high amounts of sodium, because consuming too much salt can make you retain water, and make cellulite more visible. Avoid processed sugar, sugary drinks, alcohol, and junk food overall because it makes cellulite worse as it slows down collagen production, making the dimples on the skin look more noticeable.


Instead, try incorporating healthier foods into your diet like fruits, vegetables, and lean protein.
Eat foods that are high in vitamin A, E, C, and fiber to boost collagen production that can make the skin appear smoother and more even. Eating foods like broccoli, bell peppers, banana, kiwis, oranges, flaxseed, spinach, oats, and nuts with moderation, are all great for cellulite.


4.) DRY BRUSHING.


Cottonbro


Dry brushing is great for minimizing the appearance of cellulite, as it improves blood circulation. Around once a day, dry brush your skin before hitting the shower, and afterward, moisturize the area with your favorite lotion. I promise you'll notice a difference in the way your cellulite looks within weeks.


5.) COFFEE.
Dominika Roseclay


The caffeine in coffee can help dilate the blood vessels, temporarily tighten, and plump the skin to reduce the appearance of cellulite. Try using creams that contain coffee or make your own scrub using ground coffee, coconut oil, and brown sugar.


6.) SELF TANNER.

If you want a quick fix to conceal your cellulite using a self-tanner on your legs can do the trick. Of course, it's only temporary, but it will make a difference, as it gives the illusion of smoother-looking legs.

Share
Tweet
Pin
Share
No comments
 Hadis Safari 

There are days threw out the week that I like to go out without having to put makeup on. Especially when the weather is crazy hot! Skipping days of not wearing makeup can be very beneficial for your skin. Take a break every now and then to let your skin breathe. I know that not all of us have the confidence to go outdoors without a single drop of makeup, but you'll be surprised by how much your confidence and skin can improve by making a few changes to your everyday routine. Down below, I will be sharing 14 clever tips on how to look better without makeup.


1.) EYEBROWS.

Eyebrows frame your face, so don't skip them. Having perfectly groomed eyebrows can accentuate your features and can bring out your eyes. Every 2-3 days, pluck your brows to maintain the natural shape. Trim your brows depending on how fast they grow every week or so. 

Tinting your eyebrows is another great tip for those of us that weren't blessed with beautiful thick brows. Trust me, it will make a difference in the way your eyebrows look. You won't have to fill them in for at least 2-3 weeks, and you'll feel way more confident without makeup. One of my insecurities as a teen was having sparse eyebrows due to over-plucking, so tinting my brows really boosted my confidence while I was in the process of growing them back.


2.) EYELASHES.
Aleksandra Rupar

Curling your eyelashes will make your eyes appear wider and will make you look more awake. You can follow up by applying a clear mascara or a small amount of coconut oil to the top and bottom lashes to give the illusion of longer-looking lashes. Meanwhile, at the same time, you will be nourishing them and possibly even make them grow.


3.) HAIR.


 Jessica Dabrowski

Choosing the right hairstyle and hair color for your face can drastically change your overall look. Making you look instantly better. Take good care of your hair by minimizing the amount of heat you use and instead try to incorporate heatless hairstyles into your routine.  Other days try rocking your natural hair texture and apply a hair treatment whenever you need to.


4.) LIPS.

The Honest Company

Take care of your lips by exfoliating them 2-3 times per week. Always moisturize your lips afterward, for softer-looking lips. I personally love tinted lip balms, as they always give my lips a pretty color.


5.) SUNSCREEN.


Applying sunscreen to the face and body when heading outdoors is extremely important, as it protects your skin from the sun's harmful rays that cause dark spots, and premature wrinkles. Make sure to apply sunscreen every single day, even when the weather is overcast.


6.) CHANGING YOUR EATING HABITS. 


Dose Juice


Eating healthy is really important for your health, but it's also good for your skin. Try incorporating fruits and vegetables into your diet. Drink plenty of water, 8 glasses daily to keep your body and skin hydrated throughout the entire day. Avoid consuming too much sodium, junk food, and artificial sweeteners. Changing the way you eat won't only better your health, you'll also notice a difference in the way your skin looks.


7.) CLEANSING YOUR SKIN. 

Washing your face daily is essential for beautiful-looking skin. Especially when you've been wearing makeup all day. Make sure to remove all of your makeup. Not washing your face can lead to breakouts, clogged pores, and even wrinkles! Exfoliate your skin at least 1-2 times per week. Exfoliating is great for your skin because it gets rid of all the dead skin cells, and it leaves your skin looking healthier. 


8.) MOISTURIZING.


Shiny Diamond 

After washing your face, hydrate your skin right after to avoid drying it out. Moisturizers and facial oils are packed with many amazing benefits your skin needs. Ever since I incorporated serums into my skincare routine, I have noticed a difference in the way my skin feels and looks. Always make sure to use products that are meant for your skin type.


9.) HUMIDIFIER.

Humidifiers aren't only great for cleaning the air we breathe inside our home, it's also beneficial for our skin. Especially during the colder weather. This is typically when our skin dries out the most, and even more so if your skin is naturally dry like mine is. I tend to struggle with flaky and cracked skin, so placing a humidifier inside my bedroom while I sleep keeps my skin moisturized the entire night. Make sure to clean out your humidifier once a week to avoid mold and bacteria. Which can be worse for the air we breathe and for our skin.


10.) GETTING ENOUGH SLEEP. 


Logan Nolin


Getting a full night's sleep will help minimize the appearance of dark circles, under-eye bags, and will lessen the appearance of wrinkles. Try getting a good night's sleep, and if possible, try sleeping on your back to avoid smashing your face on the pillow. Swap your pillowcase for a silk one instead, to reduce the appearance of fine lines 


11.) ACCESSORIZING. 


Dmitry Zvolskiy

There is something about putting on a pair of earrings that instantly makes me feel better about the way I look. Jewelry in general, always adds that extraneous I need to the entire outfit that I just love. Next time you decided to go out, put on your favorite pair of earrings, necklaces, or bracelets to add more fab to your overall look, I promise you'll instantly feel better.


12.) DRESSING UP.

 Amanda Vick 

Avoid wearing oversized clothes, and instead, opt for something more fitted, that will help flatter your body. Choose colors that best complement your skin tone, and don't be afraid to add pattern to your outfit. Wear whatever makes you feel comfortable, but most importantly, whatever makes you feel happy.


13.) CHEATING.


Liubov Ilchuk 

It's 100% okay to cheat every now and then. Wear makeup on the days your skin doesn't look its best (I know I do.) Apply a bit of concealer to brighten up the under eyes or to cover up any blemishes. Apply bronzer or blush to bring color to the face. Another great tip is to use a fake tanner that is meant for the face, to act as a semi-permanent bronzer or contour.


14.) CONFIDENCE.


 ATC Comm 

Last but not least, try to be more comfortable in your own skin. Embrace your insecurities and learn to love them as they are what make us different from everyone else. I hope you give some of my tips a try and that they work for you. I wish you the best of luck on your journey of loving yourself with and without makeup. XOXO


Share
Tweet
Pin
Share
No comments
Older Posts

About me


Hi there! My name is Stefany. I am the writer and creator of Opal Crown. a crafty blog that covers DIY projects, beauty, fashion, decor, lifestyle, sustainability, and much more.

Subscribe For Weekly Updates

* indicates required

Popular Posts

  • DIY Flaxseed Mask For Hair Growth
  • DIY Beaded Phone Charm
  • Fringed Tassel Earrings
  • How to make rice water for hair growth
  • DIY Rose Petal Body Scrub
  • Thrifted Scalloped Glass Bowl Makeover
  • DIY Bandana Halter Top
  • DIY HAIR & SCALP DETOX MASK (+ How to use it)

Featured Post

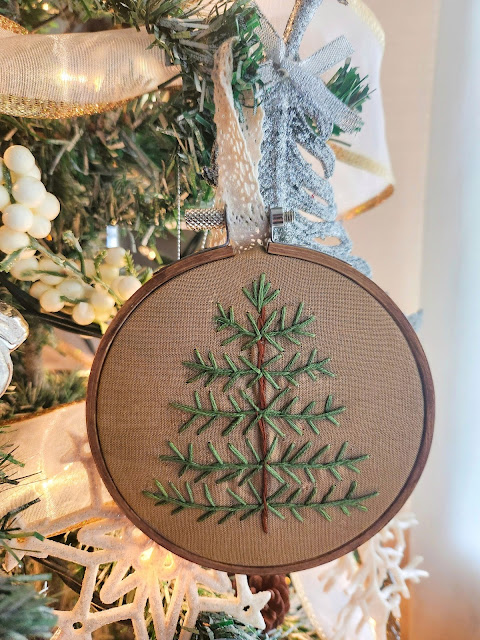
DIY Embroidered Christmas Ornaments

Are you looking for a unique gift idea or new, adorable ornaments to hang on your tree this year?   I have the answer—embroidered ornaments!...

Click To Download

Click To Download
Stay focused and organized throughout the day with a daily planner to help you stay on track with your daily tasks. There are 3 different styles to choose from.

Follow Us

  • instagram
  • pinterest
  • youtube
  • tik tok

Created with by ThemeXpose | Distributed by Blogger Templates