• Home
  • Beauty
    • ALL BEAUTY
    • SKIN CARE
    • HAIR CARE
    • BODY CARE
    • NAIL CARE
    • BEAUTY TIPS
  • FASHION
    • ALL FASHION
    • DIY STYLE
    • DIY ACCESSORIES
  • Eco-friendly
    • ALL ECO
    • ZEROWASTE HOME
    • ZEROWASTE BEAUTY
    • UPCYCLE STLYE
  • Decor
    • ALL DECOR
    • DIY DECOR
    • WALL ART
    • UPCYCLE DECOR
    • CRAFTS
    • DIY FESTIVE
  • SEWING
    • ALL SEW
    • SEW STYLE
    • SEW ECO
    • SEW PROJECTS
  • Holiday
    • ALL FESTIVE
    • DIY CHRISTMAS
    • DIY AUTUMN
    • DIY HALLOWEEN
    • VALENTINE'S DAY
    • GIFTS
  • Dine
  • LIFESTYLE
  • Contact
  • Collaborate
  • Subscribe
  • POLICY
Powered by Blogger.

Opal Crown


Over the past couple of years, I've had all kinds of different bangs. I've had blunt bangs, wispy bangs, curtain bangs, side-swept bangs, all sorts of bangs! So, if you're considering getting bangs, you've come to the right place. I've experimented with a variety of fringe styles that I consider myself an "expert" at this point. Before you decided to cut your hair, consider looking at my list of pros and cons of getting bangs.



PROS:

1.) It enhances: When styled correctly, bangs can frame your face and enhance your natural beauty traits. They can soften your appearance and enhances your facial features, such as your eyes and lips.

2.) You can wear less makeup: If you have bangs, you don't need to apply foundation on the forehead; light powder dust will do. You also don't have to worry about drawing perfectly even eyebrows.

3.) It is versatile: The best thing about having bangs is how versatile they are! Although it may appear that you are limited to one style of bangs, you actually have the option of styling them in a variety of ways. 
  •  You can split them in the center. 
  •  If you're in between trims, try pushing your bangs to the side for a side-swept look that will keep them out of your eyes for the moment.
  •  You can pin them back if you don't want to style them that day. 
  • You can just wear them down. There are so many things you can do with bangs. They're a lot of fun to play with, so don't limit yourself!
4.) Bangs can provide excellent coverage for the eyebrows and forehead: If you have a large forehead or maybe overplucked your brows and want to cover them up, bangs are the way to go! P.S large foreheads are beautiful...

5.) The advantage of having bangs is that you can look put together without much effort: They can elevate a casual outfit and can make a simple hairstyle look more polished.

6.) It can help conceal flaws: Bangs can help you hide imperfections like acne, wrinkles, and a thinning hairline. Luckily, bangs offer a lovely coverage of a portion of the face, so if you have a zit, a receding hairline, or lines on your forehead, bangs got your back!

7.) Bangs can help you appear younger: Yes, you read that correctly. If you want a more youthful appearance getting bangs can do that for you. Just look at Zooey Deschanel for example. Although she's in her 40s, she still looks like she's in her 30s. That's the power of the bangs!


CONS:

1.) They're high maintenance: The first and most important thing is that bangs require a lot of maintenance. To maintain their stunning appearance, you must style and care for your bangs regularly. To get your bangs into place, you may occasionally need hairstyling tools. (Your BFF will be a blow drier and a round brush.) You may also need dry shampoo to avoid washing them daily.
 
2.) Greasy bangs: Compared to the rest of the hair, they can become greasy more quickly. I'm not sure why, but it may be due to the natural oils on the forehead, products used to moisturize the hair, and many other factors.

3.) Frequent haircuts: If you want to keep your bangs at their ideal length, you may need to visit the salon every 2-3 weeks.

4.) High-humidity climate: Unfortunately, too much humidity can result in flat bangs. If you live in a hot city or country, you should think twice about getting bangs. Because they will become sweaty and frizzy.


Share
Tweet
Pin
Share
1 comments

Hair loss is a common issue that affects everyone at some point in their lives. This could be attributed to a variety of factors. Stress, as well as the use of excessive heat tools and certain hair products, are common causes. This rosemary-infused oil stimulates hair growth while also promoting a healthy scalp. The combination of the carrier oil and dried rosemary leaves makes this hair-growing oil an excellent addition to your natural hair care routine. All hair types and textures benefit from this oil treatment. It provides hair follicles a natural boost by increasing strength and elasticity. So, here's how to make your own rosemary oil to regrow your hair.


ROSEMARY  BENEFITS:
  • Adds shine
  • Prevents dandruff
  • Prevents hair loss
  • Promotes hair growth
  • Strengthens hair
  • Thickens hair
  • Can slow down graying hair 

CASTOR OIL:
  • Promotes shine
  • Prevents hair loss
  • Nourishes the scalp
  • Stimulates hair growth
  • Strengthens hair 


 INGREDIENTS:

  • Rosemary  (preferably dried)
  • Carrier oil of choice ( I used castor oil )
  • Sterilized container 

WATCH THE VIDEO OR SKIP DOWN BELOW FOR THE STEP-BY-STEP GUIDE:


DIRECTIONS:

1.) If you're using fresh rosemary, wash it to remove any dirt and let it dry completely.
2.) Once dry, bake it in the oven or hang it upside down for 2 weeks near a sunny window to dry.
3.) Remove the leaves from the stem and place them in a container.
4.) Pour the carrier oil over the rosemary and cover it with the lid.
5.) Store the rosemary-infused oil in a dark place to allow the extract to ferment for 2-4 weeks.
6.) Once the oil is ready, strain it into a clean jar and cover it with a lid.
7.) Use the oil when needed.


HOW TO USE IT FOR HAIR GROWTH:

1.) Brush your hair beforehand to remove any knots or tangles before you start oiling it. This will simplify the process of applying the oil.
2.) Apply the rosemary-infused oil on your scalp and massage in a circular motion for 5-10 minutes.
3.) Distribute the remaining oil on your palms to the ends of your hair.
4.) Cover with a shower cap and leave the oil on for 30 minutes to an hour.
5.) Shampoo and condition your hair as usual.


    Click To Print    


Share
Tweet
Pin
Share
No comments

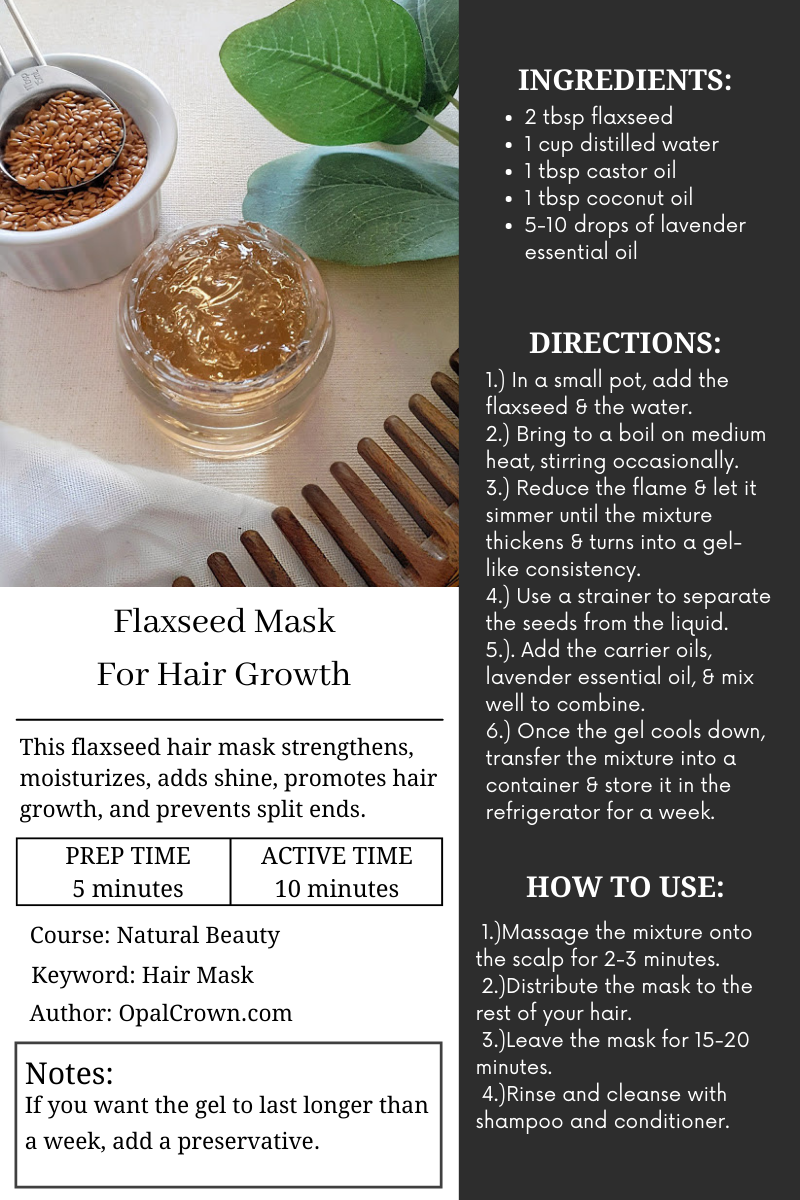
 Ever since I stopped using heat on my hair and focused on growing it out, I'm more conscious of what products I use on my hair. It's been almost 3 months since I started to embrace my natural wavy locks. I've read many articles that rave about flaxseed gel and have seen many videos of women applying the gel to their hair. After all the research I did on flaxseed, I learned all of the amazing benefits that it contains. I decided to try it out and was pleased by how much healthier and stronger my hair feels and looks. I show you two different methods on how to use the flaxseed gel and how to make it.


FLAXSEED: Flaxseed is rich in omega 3-fatty acids and proteins that can reduce inflammation and increase blood circulation. It contains B vitamins which are known for strengthening the hair follicle. It makes the hair stronger, healthier, and shinner. It also contains vitamin E, which reduces free radicals on the scalp, increases shine, promotes hair growth, and prevents split ends.

CASTOR OIL: Castor oil contains vitamin E, omega 6-fatty acids,  and many more nutrients that can help improve the condition of your hair. When massaged onto the scalp, castor oil can increase blood circulation and promote hair growth. It is also known for minimizing damaged hair, reducing dandruff, and can moisturize dry hair.

COCONUT OIL: Coconut oil is high in vitamins E, B12, zinc, and iron that can help boost hair growth. It can help prevent a dry and flaky scalp, as well as treat dandruff. Coconut oil increases shine, strengthens the hair, reduces split ends and breakage.

LAVENDER OIL: Lavender oil increases hair growth, prevents thinning, hair fall, and hair breakage. It contains antimicrobial properties that can help prevent bacteria, an itchy scalp, and dandruff. 


INGREDIENTS:

  • 2 tbsp flaxseed
  • 1 cup distilled water
  • 1 tbsp castor oil
  • 1 tbsp coconut oil
  • 5-10 drops of lavender essential oil


DIRECTIONS:

1.) In a small pot, add the flaxseed and the water.
2.) Bring it to a boil on medium heat, stirring occasionally. 
3.) Reduce the flame and let it simmer until the mixture thickens and turns into a gel-like consistency.
4.) Separate the water from the flaxseed with a strainer.
5.). Add the castor oil, coconut oil, lavender essential oil, and mix well to combine.
6.) Once the gel cools down, transfer the mixture into a container, and store it in the refrigerator for a week. 


NOTE:
*If you want the gel to last longer than a week, add a preservative.*


HOW TO USE IT AS A HAIR MASK:

 1.)Massage the mixture onto the scalp for 2-3 minutes. 
 2.)Distribute the mask to the rest of your hair.
 3.)Leave the mask for 15-20 minutes.
 4.)Rinse and cleanse with shampoo and conditioner.


HOW TO USE IT AS A HAIR GEL:

1.)Apply a small amount of the gel to freshly washed hair and style as you normally would.
2.)You can also apply the gel on second-day hair to freshen up your waves/curls.


    Click To Print    


Share
Tweet
Pin
Share
No comments

Are you trying to grow your hair this summer? Then you might want to try this natural aloe vera hair mask. Aloe vera is known for its healing properties, but it's also shown to boost hair growth. This succulent is rich in vitamins, minerals, and antioxidants. It helps keep your scalp hydrated, treats dry hair, and promotes healthier hair. Creating this recipe is easy and consists of 3 simple ingredients you might already have in your kitchen, so let's begin...


ALOE VERA: Aloe vera contains amino acids, vitamins A, C, and E that help strengthen the hair, promote hair growth, improves shine, and make the hair softer. It also reduces dandruff and prevents itching on the scalp. Aloe vera also contains vitamin B12 and folic acid that prevents hair fall and breakage. 

CASTOR OIL: Castor oil contains fatty acid ricinoleic acid. When applied to the scalp, it increases blood circulation, which helps promote hair growth. It reduces inflammation which can help treat dandruff. Castor oil reduces hair loss, strengthens the hair, and nourishes a dry scalp. 

VITAMIN E OIL: Vitamin e oil promotes a healthy scalp, increases hair growth, prevents hair loss, and increases hair shine.


INGREDIENTS:

  • 2 tbsp aloe vera gel
  • 1 tbsp castor oil
  • 1 tsp vitamin e oil


DIRECTIONS:

1.) In a container, add the aloe vera gel, castor oil, and vitamin e oil.
2.) Mix everything well to combine all of the ingredients.


HOW TO USE:

  • Apply the hair mask to your scalp.
  • Massage your scalp for 2-3 minutes.
  • Distribute the mixture evenly all over your hair.
  • Cover your hair with a shower cap and leave it on for 15-20 minutes.
  • Remove the shower cap and rinse your hair as you usually would.


Share
Tweet
Pin
Share
No comments


I've always assumed I had straight hair. Until I watched videos on the internet of women with my hair type trying the curly girl method. I was shocked to see these women's hair transform from frizzy "straight hair" to gorgeous wavy/curly hair. I was intrigued and curious to find out if my hair was actually wavy. I used to wonder why my hair was never pinned straight and why some strands were on the wavier side.  I noticed a difference in the texture of my hair after I stopped using heat tools, products with harsh ingredients, and when I cut off the dead ends. When I finally tried the curly girl method, I discovered that my hair was wavy. The more I did it, the wavy my hair became. This experience taught me how to properly care for my hair and how to embrace my 2a/2b waves.


LEARNING ABOUT HAIR PATTERNS:

Back when I had no idea my hair was wavy. My haircare routine after the shower was straightforward. I'd let my hair air dry before brushing it and would apply a small amount of oil to the ends (that was it!)  I'd always noticed that I had a slight wave in my hair, almost like an "s" shape. I discovered my curl pattern after watching Brad Mondo. (His video was very informative, especially if you don't know what your hair pattern is.) He discusses four separate topics. The first of which is scalp type. Which can be normal, oily, or dry. Hair thickness and density fall into the second category. People (including myself) frequently confuse the differences between these two topics, so he explains them in greater detail in his video. He'll help determine whether your hair is thick or thin. If it's damaged or if it's healthy. The final topic he discusses is hair patterns. Type 1 is a rare hair type that is naturally straight with no curl pattern. If your hair isn't pinned straight, it's because it's wavy or curly. Wavy, curly, and coiled hair are the three subcategories. Once you've determined your hair type, you'll have a thorough understanding of what products your hair requires.


HOW I TRANSITIONED:

As stated earlier, I stopped using heat on my hair to reduce damage, switched to natural products, and got rid of the split ends. I purchased hair care products specifically designed for wavy/curly hair. Along with styling moose/gel. Once a week, I use hair treatments to strengthen and repair my hair. A few times a month, I rinse my hair with rice water, which has improved the overall texture of my hair. In addition, I use a regrowth serum ( I highly recommend incorporating both into your hair care routine.) I scrunch and plop my hair after the shower. After that, I'll wrap a silk scarf around my hair before going to bed.


THEN V.S NOW:


My hair used to be damaged, dry, dull, and frizzy. I had no idea what products to use or how to tame it. I didn't even have a proper hair care routine. My hair is now thicker, healthier, softer, and more manageable. My hair looks wavier the more I embrace my natural hair texture. My routine isn't perfect. In fact, I still have difficulty styling my hair, but at least I now know how to care for it.

DON'T GIVE UP:

Never in a million years did I imagine my hair to be wavy. I've only been using the curly girl method for a month, and I've already noticed a significant improvement in my hair's appearance and texture. Transitioning to wavy hair is difficult as it requires a lot of maintenance, but believe me when I say it gets easier once you get the hang of it. If you think you have wavy/curly hair and want to find out, I recommend the curly girl method. Walmart and Target sell affordable hair products for curly hair under 20 dollars. Give it a shot, and share your results in the comments section below.


Share
Tweet
Pin
Share
No comments

  Here on my site, we've already covered facial and underarm detox masks. But did you know that detoxifying you're scalp is also a thing? Well, today I'm going to show you how you can make your own and how to use it. 


WHAT IS A SCALP DETOX MASK?

A scalp detox mask helps remove dead skin cells, unclogs the pores from your scalp, fights off dandruff, reduces irritation, clears product build-up, stimulates hair growth, balances the scalp's natural oils and ph.  It's important to deep cleanse your scalp with a detox mask to help promote a healthy scalp. Ideally, I like to use this mask once a month. Sometimes I'll use it more often depending on my hair and how it feels. 


HOW TO KNOW YOU NEED A SCALP DETOX:

You might consider using a scalp mask if you experience an itchy scalp, inflammation, dandruff, or you have a lot of product build-up.


BENTONITE CLAY: Bentonite clay encourages hair growth, conditions, adds shine, draws out impurities from the hair and scalp. 

ACV: Apple cider vinegar contains properties that balance your scalp. It is anti-inflammatory, minimizes irritation, eliminates dandruff, and reduces hair loss.

ALOE VERA: Aloe vera does wonders for your hair. It promotes hair growth, eases an itchy scalp, reduces dandruff, moisturizes dry hair, and repairs dead skin cells from the scalp.

ROSEMARY ESSENTIAL OIL: Rosemary oil contains antibacterial properties, encourages hair growth, improves blood circulation, prevents dandruff, and strengthens the hair.


INGREDIENTS:

  • 4 tbsp Bentonite clay
  • 3 tbsp Apple cider vinegar
  • 1 tbsp Aloe vera gel
  • (optional) 5-10 drops rosemary essential oil


DIRECTIONS:

1.) In a non-metallic bowl, add the clay, vinegar, aloe vera gel, and rosemary oil.
2.) Mix everything well to combine all of the ingredients. 


HOW TO USE IT:

1.) To use, simply massage the mixture onto the scalp for 1-2minutes. Distribute the mask to the rest of your hair.
2.) Leave the mask for 10-15 minutes, then rinse and cleanse with shampoo and conditioner.


    Click To Print    


Share
Tweet
Pin
Share
No comments
Older Posts

About me


Hi there! My name is Stefany. I am the writer and creator of Opal Crown. a crafty blog that covers DIY projects, beauty, fashion, decor, lifestyle, sustainability, and much more.

Subscribe For Weekly Updates

* indicates required

Popular Posts

  • DIY Flaxseed Mask For Hair Growth
  • DIY Beaded Phone Charm
  • Fringed Tassel Earrings
  • How to make rice water for hair growth
  • DIY HAIR & SCALP DETOX MASK (+ How to use it)
  • DIY Rose Petal Body Scrub
  • Thrifted Scalloped Glass Bowl Makeover
  • DIY Bandana Halter Top

Featured Post

DIY Embroidered Christmas Ornaments

Are you looking for a unique gift idea or new, adorable ornaments to hang on your tree this year?   I have the answer—embroidered ornaments!...

Click To Download

Click To Download
Stay focused and organized throughout the day with a daily planner to help you stay on track with your daily tasks. There are 3 different styles to choose from.

Follow Us

  • instagram
  • pinterest
  • youtube
  • tik tok

Created with by ThemeXpose | Distributed by Blogger Templates