• Home
  • Beauty
    • ALL BEAUTY
    • SKIN CARE
    • HAIR CARE
    • BODY CARE
    • NAIL CARE
    • BEAUTY TIPS
  • FASHION
    • ALL FASHION
    • DIY STYLE
    • DIY ACCESSORIES
  • Eco-friendly
    • ALL ECO
    • ZEROWASTE HOME
    • ZEROWASTE BEAUTY
    • UPCYCLE STLYE
  • Decor
    • ALL DECOR
    • DIY DECOR
    • WALL ART
    • UPCYCLE DECOR
    • CRAFTS
    • DIY FESTIVE
  • SEWING
    • ALL SEW
    • SEW STYLE
    • SEW ECO
    • SEW PROJECTS
  • Holiday
    • ALL FESTIVE
    • DIY CHRISTMAS
    • DIY AUTUMN
    • DIY HALLOWEEN
    • VALENTINE'S DAY
    • GIFTS
  • Dine
  • LIFESTYLE
  • Contact
  • Collaborate
  • Subscribe
  • POLICY
Powered by Blogger.

Opal Crown

Lauren Fleischmann

For years and years now, I've been dying my own hair at home. Not only do I save money by doing so, but I also enjoy the process. I love that I can give myself a fresh new look without having to leave the comfort of my own home. However, dying your hair from home can be a bit tricky, that's why I decided to share with you ladies some of my favorite tips and tricks to make dying your hair, less intimidating and a lot easier, so let's get started...


MATERIALS NEEDED:

  • Hair dye kit
  • Comb
  • Petroleum jelly
  • Hair clips
  • Gloves
  • Old T-shirt
  • Deep conditioner for your hair type


TIPS:


1.) PICK THE RIGHT SHADE.


Before you buy any hair dye, make sure to pick the right shade for your skin tone. One way of telling what your undertone is by looking at the veins on your wrist. There are 3 different kinds of undertones cool, warm, and neutral.


  • For example, if the color of your veins is bluish-purple, then you are cool-toned.
  • If they are green, then you are a warm tone.
  • If they are bluish-green, then you are neutral. This basically means you can rock both.


2.) BUY TWO BOXES.

Now that you have determined what shade to buy, make sure to purchase two boxes for your hair. Trust me, I've made the mistake of buying one box in the past and ran out halfway through the process. 


3.) STRAND TEST.

Taking the time to do a quick strand test before you decided to dye your hair is important, especially when you are using a new shade to determine the outcome of the color. To do this, take a small section of hidden hair, and apply the hair dye.


4.) PREP THE HAIR.

Before you begin to dye your hair, make sure to work with dirty hair. Dying your hair when it's dirty allows the natural oils in your hair to protect the scalp from getting irritated by harsh chemicals.


5.) PROTECT YOUR HAIRLINE.

One of the worst things about not protecting your skin from the hair dye is the leftover stain it leaves behind. Fortunately, it's easy to avoid. Just apply vaseline or lip balm on the hairline, neck, and ears.


6.) PREPARING THE DYE.

Cottonbro


Every box dye comes with different instructions on how to prepare the hair dye. Usually, the directions are easy to follow. Just mix all of the ingredients in the bottle provided or in a bowl.


7.) CHANGE YOUR OUTFIT.

The last thing you want is to ruin your favorite top by staining it with hair dye. Change into clothes you don't really care about and put on a pair of gloves to avoid staining your hands with dye.


8.) PREP YOUR STATION.

Hair dye can stain anything, from wood, plastic, walls, etc... Make sure to cover the areas where you'll be dying your hair.


DIRECTIONS ON DYING THE HAIR:


1.) SECTION YOUR HAIR.


Use large hair clips to section the hair in 4 equal sections to apply the hair dye evening.


2.) START AT THE TOP.

Cottonbro

Start by applying the dye directly to the roots since they need the most time to develop. Then, brush the hair dye down through the rest of your hair until the ends of your hair are fully covered.

Clip the hair back up and continue to do this until you are done with all 4 sections.


3.) WAITING.

Sarah Pflug

Now it's time to wait, you can set a timer to remind you when it's time to wash off the
Share
Tweet
Pin
Share
No comments

 HOW TO UPCYCLE OLD GLASS JARS INTO KITCHEN CANISTERS

Why waste money on brand new mason jars to store your food. When you can repurpose your emptied glass jars of marinara sauce. They work just as good, are basically free, and look pretty darn cute. I personally love using these glass jars to fill them with spices, seeds, nuts, and many more things I purchase in bulk. They're also perfect to store leftover food, fresh herbs, and homemade salsa. If you want to learn how to repurpose your empty glass jars, then keep on scrolling. 


1.) Removing Labels.


Removing the labels from these jars is pretty easy to do but the leftover residue glue, on the other hand, isn't. Luckily I just found out how to remove it. All you need is 3 simple ingredients. Grab a bucket or large pot and fill it with enough hot water to submerge your glass jars. Add a cup of vinegar and a few squirts of dish soap. Place your jars inside the pot for at least 15-30 minutes. The longer you wait the easier the glue will dissolve. Afterward, peel the rest of the label off and scrub any leftover residue with a rough sponge or brush.


2.) Adding Labels. 

Next, add labels to the glass jars. I purchased mine at my local dollar tree a few months ago, but if you can't get your hands on chalkboard labels. You can use chalk paint to make your labels instead. You also have the option of writing directly onto the jars with an oil-based marker.


3.) Painting The Lids.

Next, paint your lids using acrylic paint and a brush.


4.) Once the jar lids are dry, you can fill them with whatever you'd like, and you are all finished!


I hope you guys enjoyed today's post, and if you did please don't forget to subscribe for more content just like this one. 

RELATED POSTS:
  • Simple Eco-Friendly Kitchen Alternatives
  • How To Make Produce Bags
  • How To Store Produce Without Plastic
  • DIY Cutlery Wrap
  • Natural All-Purpose Cleaner


Share
Tweet
Pin
Share
No comments


Whenever I'm trying to save some money splurging on pedicures isn't always doable, but giving myself one from home is. Especially now that my feet are in desperate need of a fresh new pedicure, I thought it was the perfect occasion to share with you guys how I transformed my feet from fugly to fab! Thankfully it's a lot easier to achieve than you think just follow my ultimate guide on how to give yourself a salon-worthy pedicure from home. 


1.) Sanitizing Your Nail Tools.


Start off by sanitizing your tools with soap and water. Once dried, disinfect them with rubbing alcohol. 


2.) Remove Your Old Nail Polish.


Next, it's time to get rid of your old nail polish. Soak a cotton ball in nail polish remover to get rid of any leftover polish and any excess oil.


3.) Soak Your Feet.


Grab a bucket and fill it with warm water. Add your favorite bath salt and soak your feet for 10-15 minutes to allow your feet to soften. Remove your feet from the water and use a pumice stone to gently remove the calluses from under your feet. 


4.) Trimming Your Nails.


Dry your feet with a towel and gently push back your cuticles. Don't remove them because cuticles protect your nails from bacteria. Then, trim your nails straight across to avoid obtaining ingrown toenails. File the nails in one direction as filing back and forth (sawing motion) will only make your nail bed fragile and cause breakage. Afterward, buff your nails to make them smooth.


5.) Moisturizing Your Feet.


BreakingPic

 Massage your feet with a hydrating lotion of choice to help moisturize your feet. Then apply cuticle oil to each individual toenail. Make sure to massage the oil on your cuticles and the sides of your nails. 


6.) Painting Your Nails.

Sarah Pflug


Grab a cotton ball soaked with rubbing alcohol to remove any oily residue that can cause your nail polish to chip. Use a toe separator (If you have one.) Apply a basecoat, and once dried, apply a thin layer of nail polish (I recommend two coats) letting the polish dry in between coats. Lastly, finish off with a top coat to seal in the polish.


Share
Tweet
Pin
Share
No comments
Older Posts

About me


Hi there! My name is Stefany. I am the writer and creator of Opal Crown. a crafty blog that covers DIY projects, beauty, fashion, decor, lifestyle, sustainability, and much more.

Subscribe For Weekly Updates

* indicates required

Popular Posts

  • DIY Beaded Phone Charm
  • DIY Flaxseed Mask For Hair Growth
  • Thrifted Scalloped Glass Bowl Makeover
  • Fringed Tassel Earrings
  • How to make rice water for hair growth
  • DIY HAIR & SCALP DETOX MASK (+ How to use it)
  • DIY Rose Petal Body Scrub
  • DIY ROPE PLACEMATS WITH FRINGE

Featured Post

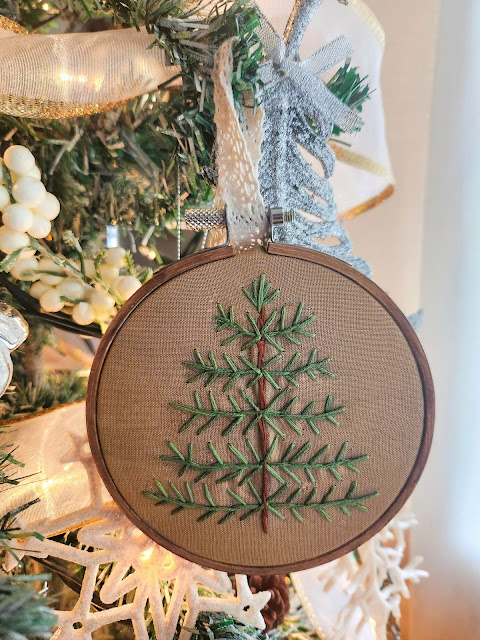
DIY Embroidered Christmas Ornaments

Are you looking for a unique gift idea or new, adorable ornaments to hang on your tree this year?   I have the answer—embroidered ornaments!...

Click To Download

Click To Download
Stay focused and organized throughout the day with a daily planner to help you stay on track with your daily tasks. There are 3 different styles to choose from.

Follow Us

  • instagram
  • pinterest
  • youtube
  • tik tok

Created with by ThemeXpose | Distributed by Blogger Templates