• Home
  • Beauty
    • ALL BEAUTY
    • SKIN CARE
    • HAIR CARE
    • BODY CARE
    • NAIL CARE
    • BEAUTY TIPS
  • FASHION
    • ALL FASHION
    • DIY STYLE
    • DIY ACCESSORIES
  • Eco-friendly
    • ALL ECO
    • ZEROWASTE HOME
    • ZEROWASTE BEAUTY
    • UPCYCLE STLYE
  • Decor
    • ALL DECOR
    • DIY DECOR
    • WALL ART
    • UPCYCLE DECOR
    • CRAFTS
    • DIY FESTIVE
  • SEWING
    • ALL SEW
    • SEW STYLE
    • SEW ECO
    • SEW PROJECTS
  • Holiday
    • ALL FESTIVE
    • DIY CHRISTMAS
    • DIY AUTUMN
    • DIY HALLOWEEN
    • VALENTINE'S DAY
    • GIFTS
  • Dine
  • LIFESTYLE
  • Contact
  • Collaborate
  • Subscribe
  • POLICY
Powered by Blogger.

Opal Crown

Lunar decor is one of my fav things to DIY. For today's project, I'll be sharing how I made this moon phase wall tapestry. If you like boho/minimal interior design, then you'll love this wall art. You only need a few supplies and around 20 minutes to tackle this project. 


 MATERIALS NEEDED:

  • The fabric of choice ( I used scrap burlap fabric)
  • Black fabric paint
  • Paintbrushes
  • Tassel trim
  • Dowel
  • Jute twine or yarn
  • Hot glue gun
  • A round object
  • Pencil


DIRECTIONS:

1.) Decide what size you would like the tapestry to be. (I had leftover fabric from a previous project that was the perfect length.) The size of my tapestry is 10" x 26".

2.) Use a round object to trace each moon phase.


3.) Paint the moons with black fabric paint.


4.) Glue the tassel trim to the end of the tapestry.


5.) Wrap the top side of the fabric around the wooden dowel and hot glue it down.

6.) Tie a piece of yarn around each end of the dowel to hang the tapestry.


7.) All done!


Share
Tweet
Pin
Share
1 comments


Good morning everyone, today I'm going to show you how to make this beautiful embroidery hoop art design. I got the idea of painting a woman's portrait with elegant flowers from a YouTuber called Dalia. She's so talented and creative. ( I'll leave a link to her youtube channel here.) In her video, she used pressed flowers as the women's hair. I didn't have any on hand, so I decided to embroider mine instead. If you are new at embroidery,  I used the wagon wheel pattern to create beginner-friendly roses. 


MATERIALS:

  • Embroidery hoop
  • Embroidery thread & needle
  • linen Fabric
  • Puffy Paint
  • Scissors
  • Pencil


DIRECTIONS:

1.) Sketch a simple portrait of a woman with a pencil.


2.) Trace the woman's silhouette with black paint. 


3.) Allow the paint to dry.

5.) Draw a circle (the size you want the rose to be.) 

6.) Draw 5 lines coming out from the center. ( It should look like a wagon wheel.)


7.) Bring the needle up through the middle of the wagon wheel and stitch the five lines.

8.) Next, weave the needle in and out of the wagon wheel. (Weaving the thread over and under.) 


9.)Keep weaving the needle until the wagon wheel is full.


10.) Decorate the roses with leaves.


Share
Tweet
Pin
Share
No comments

I was looking online for a simple art piece to place in my dining room. I wanted something minimal and boho when I got the idea to DIY my own wall decor piece instead. I took inspiration from my previous botanical wall art design I made over a month ago. Expect this time, I added embroidery to add a different touch. I used a simple stitch to embroider my design. Now, let me show you how I did.


 MATERIALS NEEDED:

  • Embroidery thread
  • Needle
  • Canvas
  • Acrylic Paint
  • Paintbrushes
  • Pencil or a printed photo of choice


DIRECTIONS:

1.) I started off by painting 3 different-sized blobs using different colored paint.


2.) Once the paint dried, I sketched my design. (You can use a printed photo if you don't want to draw.)


3.) If you printed a photo, trace the design by poking holes with the embroidery needle. Try your best to keep the holes equally apart. (If you choose to draw instead, you can skip this step.)


5.) The last step was to embroider the canvas using the running stitch.


Share
Tweet
Pin
Share
No comments

  My style of decor has definitely changed over the past couple of years. I went from glamorous/chic home to a bohemian design. I love styling my place with earthy elements such as handmade decorative items, loads of plants, and of course, minimal wall decor. This brings me to today's project. I was looking at modern wall art designs on Etsy for inspiration. I found so many great ideas that I had difficulty choosing which style I wanted to recreate. The art design that caught my eye the most was a botanical abstract painting. It was exactly what I had in mind. I couldn't wait to share with you all how I did it using the reverse canvas method.


MATERIALS NEEDED:

  • Old Canvas
  • Paintbrushes 
  • Acrylic Paint 
  • Pencil
  • Hot glue gun or staple gun
  • X-Acto Knife
  • Sawtooth picture hanger


DIRECTIONS:


1.) To remove the canvas from the frame. Turn the canvas around, and carefully slice along the edges of the staples using an X-Acto knife. 


2.) Once you cut all the way around, you should be able to remove the canvas without difficulty.


3.) Remove the strip of canvas that is still stapled to the back of the frame. Don't worry about removing the staples.


4.) Flip the wood frame over, paint it or stain it using wood stain, or leave it as so.

5.) Start by creating 3 different-sized blobs. Paint each one a different color.


6.) Once the paint dries, sketch a plant or flower using a pencil.


7.) Go over the drawing with black acrylic paint.


8.) Use hot glue or a staple gun to reattach the canvas. Pull the canvas tightly to avoid any lines or wrinkles.

9.) Trim off the excessive canvas fabric.

10.) If you want to hang the canvas, simply flip it over and add a sawtooth picture hanger.


Share
Tweet
Pin
Share
No comments
Adding wall art to any place in your home or office can really transform the way a room looks. They add a pop of color without having to commit to anything drastic, like painting the walls. Because wall art is so darn expensive, doing it myself from home was the best option. Besides, I love painting, it's so much fun and a great way to relax. This kind of wall art doesn't require any painting skills and is really easy to do. If you want to learn how to do it, then keep on scrolling.


MATERIALS USED:

  • Canvas
  • Acrylic Paint
  • Paintbrushes
  • Sponge
  • Ruler & Pencil
  • OPTIONAL: Gold Fakes

DIRECTIONS:
  1. Start by drawing 5 triangular shapes of different sizes and one circle. 
  2. Paint each triangle with a different shade. 
  3. Paint the top of the mountains and the moon with gold paint.
  4. With a sponge and a darker shade of paint, gently tap each mountain to add texture to the painting.
  5. OPTIONAL: Add gold flakes to the top of the mountains and the moon to add a little bit of glam to the painting. 

I hope you enjoyed today's post, and if you did, please don't forget to share it. If you tend to like these types of posts, make sure to check out my last post here on how to abstract painting!


DIY MOON GARLAND

DIY YARN TAPESTRY 

Share
Tweet
Pin
Share
2 comments

 For the past couple of days, I've been redecorating my office space. All I needed to finish off the room was to place a piece of art above my desk. Since I couldn't find anything I liked, I thought I would go a different route, and try something handmade like a wall tapestry. Besides, making one has been on my to-do list for way too long, and thought today was the perfect opportunity to make one. Making a yarn tapestry doesn't require any skills, trust me, I have no idea how to knit. Literally, anyone can make it, just grab a couple snacks, play your favorite show, and let's begin...


SUPPLIES NEEDED:
  • Yarn (three different shades)
  • Twine
  • Beads
  • Scissors
  • Wooden Dowel


DIRECTIONS:

1.) Tie a piece of twine on each side of the wooden dowel to hang the tapestry.


2.) Cut 2 equal strands of yarn around 48 inches long.


3.) Take the 2 strings and attach them to the wooden dowel using the lark head knot method.


4.) Repeat the same step as many times as you'd like. I ended up making around 15 bundles of yarn in total.


5.) Repeat the same steps with the black and brown yarn until the entire dowel is covered.

6.) Trim the bottom of the tapestry in a "v" shape.


Boho Yarn Tapestry was first published in June 2020. We updated the photos and information in July 2020.


Share
Tweet
Pin
Share
No comments
Older Posts

About me


Hi there! My name is Stefany. I am the writer and creator of Opal Crown. a crafty blog that covers DIY projects, beauty, fashion, decor, lifestyle, sustainability, and much more.

Subscribe For Weekly Updates

* indicates required

Popular Posts

  • DIY Beaded Phone Charm
  • Fringed Tassel Earrings
  • DIY Flaxseed Mask For Hair Growth
  • DIY ROPE PLACEMATS WITH FRINGE
  • Thrifted Scalloped Glass Bowl Makeover
  • DIY Aloe Vera Mask For Glowing Skin
  • DIY HAIR & SCALP DETOX MASK (+ How to use it)
  • How to make rice water for hair growth

Featured Post

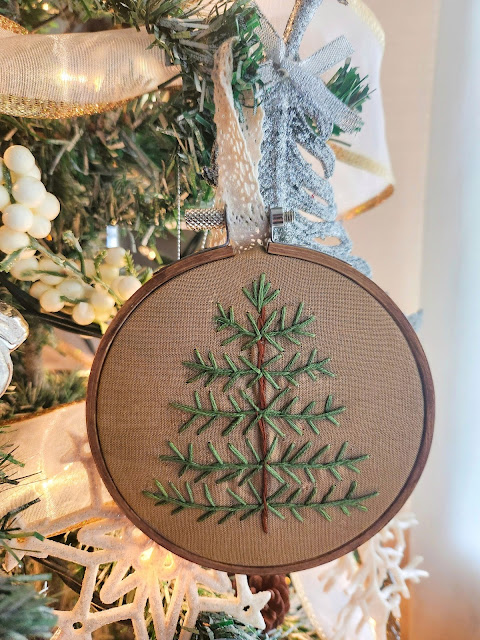
DIY Embroidered Christmas Ornaments

Are you looking for a unique gift idea or new, adorable ornaments to hang on your tree this year?   I have the answer—embroidered ornaments!...

Click To Download

Click To Download
Stay focused and organized throughout the day with a daily planner to help you stay on track with your daily tasks. There are 3 different styles to choose from.

Follow Us

  • instagram
  • pinterest
  • youtube
  • tik tok

Created with by ThemeXpose | Distributed by Blogger Templates